Parking Brake Switch (PartTerminologyID 4600): Switch Actuation Point, Circuit Architecture, and Brake Warning Indicator Compatibility
Written by Arthur Simitian | PartsAdvisory
Introduction
The parking brake switch is one of those small but essential components that most drivers never think about until something goes wrong. Tucked away near the parking brake lever, pedal, or cable assembly depending on the vehicle, this compact electrical switch performs a straightforward job: it tells the rest of the vehicle's systems whether the parking brake is engaged or released. When it works correctly, nobody notices it. When it fails, a cascade of warning lights, error codes, and safety concerns can follow.
Understanding what the parking brake switch does, how it communicates with the broader brake and electrical system, and what happens when it stops working is genuinely useful knowledge for any vehicle owner or technician. Whether you are diagnosing a persistent brake warning light, preparing for a replacement job, or simply trying to understand what a parts catalog is referring to when it lists this component, this guide covers everything you need.
Part of what makes the parking brake switch worth understanding in depth is how easily its failure can be misread. Because it shares a warning indicator with other brake system conditions, a failed switch can mask a genuine hydraulic brake fault or, conversely, cause a driver to investigate the hydraulic system extensively when the problem is simply a worn electrical contact. Getting the diagnosis right the first time saves time, money, and the kind of frustration that comes from replacing parts that did not need replacing.
The parking brake switch is also a useful entry point into understanding how modern vehicle electrical systems integrate what would once have been simple, independent circuits into a network of interconnected modules and signals. A component that on a vehicle from the 1970s would have been a single-wire circuit directly illuminating a bulb on the dashboard is now, on many current vehicles, a node in a communication network that interacts with braking dynamics, driver assistance systems, and onboard diagnostics. The principles that govern its operation have not changed, but the context in which it operates is considerably more complex.
This article walks through the full picture: the switch's design and operating principles, its role in modern vehicle safety systems, the most common failure modes, the symptoms those failures produce, how to diagnose the switch accurately before buying a replacement, and what to look for when selecting the correct part.
What the Parking Brake Switch Does
At its most basic level, the parking brake switch is a position sensor. It monitors whether the parking brake mechanism is in the applied or released position and sends that information to the vehicle's instrument cluster, body control module, or both.
When the parking brake is engaged, the switch closes an electrical circuit or opens one depending on the design. That signal travels to the instrument cluster and illuminates the parking brake warning indicator, which is typically a red light shaped like a "P" inside a circle, sometimes accompanied by the word "BRAKE." When the driver releases the parking brake, the switch changes state, the circuit opens or closes in the opposite direction, and the warning light goes out.
This sounds simple, but the switch is also integrated into more complex systems on many modern vehicles. It can interact with the antilock braking system, the electronic stability control system, hill-hold assist, and in some cases the vehicle's start-stop system or transmission logic. On vehicles equipped with electronic parking brakes, the switch or sensor is part of an even more tightly integrated actuator and control module assembly.
The parking brake itself serves as a mechanical backup to the hydraulic service brake system and is essential for holding the vehicle stationary when parked, particularly on grades. Because it is a safety-critical system, accurate status reporting by the switch matters more than it might seem at first glance.
Design and Construction
Parking brake switches come in several physical configurations, and the correct design for a given vehicle depends entirely on the parking brake mechanism used.
Lever-Mounted Switches
On vehicles with a center-console handbrake lever, the switch is typically mounted at the base of the lever assembly. The lever pivots on a fulcrum when pulled, and a tab or actuator on the lever makes contact with the switch plunger as it moves through its range of motion. When the lever is pulled up, the plunger is depressed and the switch changes state. When the lever is returned to the rest position, spring tension releases the plunger.
These switches are usually simple normally-open or normally-closed single-pole units. They are compact, inexpensive, and designed for the relatively low-stress environment of an interior console.
Pedal-Mounted Switches
Vehicles that use a foot-operated parking brake, common on many North American models from the 1980s through the early 2000s and still found on some current platforms, mount the switch near the pedal assembly rather than a lever. The operating principle is the same: a mechanical actuator on the pedal engages the switch plunger during application.
Pedal-mounted switches are subject to somewhat different stresses than lever-mounted units because the parking brake pedal is typically operated with more force than a hand lever. The switch must be robust enough to withstand repeated actuation over the vehicle's lifespan.
Cable-Mounted and Bracket-Mounted Switches
Some designs mount the switch directly to the parking brake cable or to a bracket near the cable equalizer or intermediate lever rather than at the primary actuating point. In these configurations, movement of the cable itself triggers the switch. This approach is sometimes used when the primary lever or pedal location is inconvenient for switch placement.
Electronic Parking Brake Sensors
On vehicles equipped with electronic parking brakes, the traditional mechanical switch is replaced by or supplemented with electronic position sensors integrated into the actuator motor assembly. These are considerably more complex than a simple plunger switch and are not interchangeable with mechanical switch designs. They communicate over the vehicle's data bus rather than through a simple switched circuit.
Internal Construction
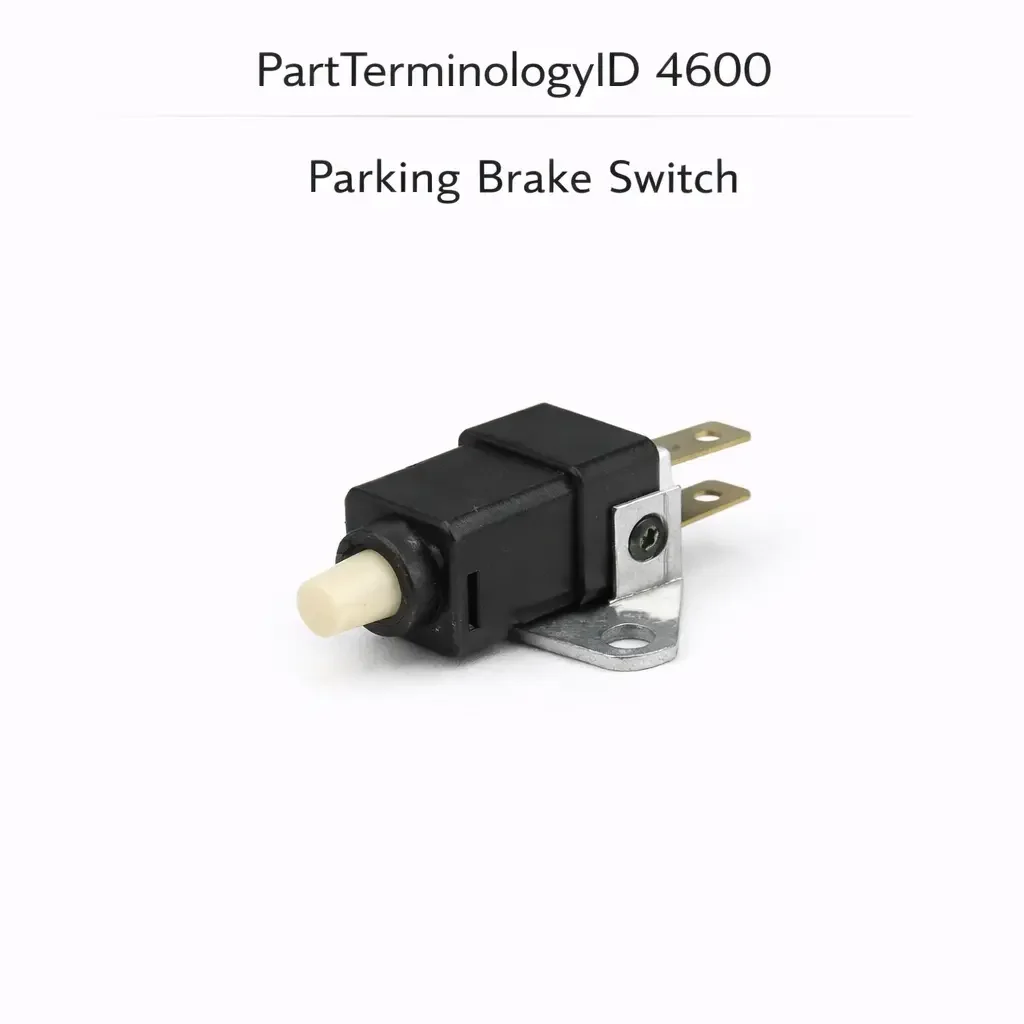
Regardless of external configuration, most mechanical parking brake switches share a similar internal construction. A plastic or metal housing contains a set of electrical contacts, a spring-loaded plunger, and the terminal connections for the wiring harness. The contacts are typically made of copper alloy with a silver or gold plating to resist oxidation. The housing material is selected for dimensional stability across temperature ranges and resistance to the chemicals present in a vehicle interior.
Quality varies significantly between manufacturers. Original equipment switches are engineered to precise tolerances and tested for a specific number of actuations. Aftermarket switches range from near-OE quality to significantly inferior products that may fail well before the vehicle's expected service life.
The Parking Brake Warning System
The parking brake switch feeds information to the warning indicator system, but the full picture of how that system works is worth understanding because it helps explain why certain failures produce specific symptoms.
The Brake Warning Light
The brake warning light on modern vehicles is a shared indicator. In most designs, it is illuminated by any one of several conditions: low brake fluid level, a hydraulic pressure imbalance between the front and rear brake circuits, engagement of the parking brake, and in some vehicles, a fault in the antilock brake system or electronic brake force distribution. On older vehicles, the light may only respond to the parking brake switch and the brake fluid level sensor.
This shared-light design means that a parking brake switch fault can be mistaken for a more serious hydraulic brake fault, and vice versa. A driver who sees the brake warning light and assumes it is the parking brake switch when it is actually a low fluid condition has been put at risk by misdiagnosis. Accurate diagnosis always matters.
Communication with the Body Control Module
On vehicles with a body control module, the parking brake switch signal is processed by the module rather than routed directly to the instrument cluster. The BCM evaluates the signal in context with other inputs. If it sees an implausible combination of signals, such as a switch indicating the parking brake is engaged while vehicle speed is above a threshold, it may log a diagnostic trouble code.
This integration is why parking brake switch faults on modern vehicles can generate codes that appear in the BCM or ABS module scan data rather than as a simple warning light with no associated code.
Hill-Hold and Related Systems
Some vehicles use the parking brake switch signal as one input to a hill-hold or hill-start assist system. These systems apply hydraulic brake pressure briefly when the driver releases the service brake on a grade, giving the driver time to move their foot to the accelerator without the vehicle rolling. If the parking brake switch signal is incorrect, the hill-hold system may not activate when expected or may activate at the wrong time.
Common Failure Modes
Parking brake switches fail in several predictable ways. Understanding these failure modes helps with diagnosis and with selecting a replacement that addresses the root cause rather than just the symptom.
Contact Wear and Oxidation
The most common failure mode is degradation of the internal electrical contacts. Over thousands of actuations, the contact surfaces wear down and develop oxidation, pitting, or contamination. The resistance across the contacts increases, the signal becomes intermittent or weak, and the switch eventually fails to change state reliably.
Contact oxidation is accelerated by moisture intrusion, which can occur if the switch housing seal is compromised or if the vehicle is frequently used in wet conditions. Vehicles in humid climates or those that have been exposed to water intrusion events are more vulnerable to this failure mode.
Mechanical Damage to the Plunger or Housing
The plunger mechanism can be damaged by physical impact, over-travel beyond the designed range of motion, or contamination with debris. If the plunger seizes in the depressed or released position, the switch will indicate the same state regardless of whether the parking brake is actually applied.
Housing damage from impact or from overtightening during a previous installation can distort the internal geometry and cause misalignment between the plunger and the actuating tab on the lever or pedal.
Broken or Corroded Wiring Connections
The failure is not always in the switch body itself. The wiring connector that plugs into the switch is subject to the same environmental stresses, and the terminals inside the connector can corrode, loosen, or break. A broken wire in the circuit will produce symptoms identical to a failed switch, and replacing the switch without inspecting the connector and wiring will not resolve the problem.
Misadjustment
Some parking brake switch designs are adjustable or require correct positioning relative to the lever or pedal. If the switch is slightly out of position, it may not actuate at the correct point in the lever's travel. The warning light may come on before the parking brake is fully released, or it may not come on until the lever is pulled significantly higher than the normal engagement point. This is not a switch failure per se but produces similar symptoms and is addressed by adjustment rather than replacement.
Failure Due to Age and Heat Cycling
Plastic switch housings become brittle over time, particularly in vehicles where the console or interior experiences significant heat cycling. A housing that has become brittle may crack under normal operating stresses, compromising the switch's internal geometry or its environmental seal.
Symptoms of a Failing Parking Brake Switch
Recognizing the symptoms of a parking brake switch problem helps distinguish this failure from others that can produce similar warning indicators.
Brake Warning Light Stays On After Releasing the Parking Brake
This is the most common and most obvious symptom. If the parking brake switch fails in the closed position or its actuator does not move correctly when the brake is released, the warning light will remain illuminated even after the driver releases the parking brake. Most drivers notice this quickly because driving with the brake warning light on is unsettling.
Before concluding the switch has failed, always verify that the parking brake is actually fully released. A parking brake that feels released but is still slightly engaged will correctly illuminate the warning light. Verify full release, then proceed to switch diagnosis if the light remains.
Brake Warning Light Does Not Come On When Parking Brake Is Applied
A switch that fails in the open position or has a broken circuit will not signal the instrument cluster when the parking brake is engaged. The driver may release the brake normally, but if they forget to release it and drive away, they will receive no warning from the instrument cluster. This is actually the more dangerous failure mode of the two.
It is also worth noting that this symptom is easy to miss because the parking brake is typically released before driving. Drivers rarely look for the warning light to confirm engagement. The failure may only be discovered during a brake inspection or when a technician checks the warning system.
Intermittent Warning Light Behavior
An intermittent light, one that flickers or comes on and goes off inconsistently, often points to a connection problem rather than a complete switch failure. Corroded or loose connector terminals are a frequent cause. The light may behave normally in warm, dry conditions but act up in cold weather or after the vehicle has been washed.
Diagnostic Trouble Codes Related to the Parking Brake Circuit
On vehicles with a body control module or an integrated brake control module, a faulty parking brake switch signal may set a DTC. The code will typically reference the parking brake switch input circuit, either as an open circuit, short to ground, short to voltage, or signal out of range. Retrieving and interpreting these codes is an important diagnostic step.
Hill-Hold System Not Operating Correctly
On vehicles with hill-hold assist, a parking brake switch fault can cause the hill-hold system to behave erratically. This is a less obvious symptom that may not immediately direct the diagnosis toward the parking brake switch, but it should be considered when hill-hold issues are present alongside other brake warning system anomalies.
Diagnostic Process
Accurate diagnosis before replacement prevents unnecessary parts purchases and ensures the actual problem is addressed.
Step One: Verify Full Parking Brake Release
Before assuming the switch has failed, confirm the parking brake mechanism itself is operating correctly and reaching full release. Inspect the lever or pedal travel, the cable tension, and the rear brake adjustment. A parking brake that does not fully release due to a stretched cable or out-of-adjustment rear brakes will keep the switch actuated even when the lever or pedal appears to be in the rest position.
Step Two: Inspect the Connector and Wiring
Disconnect the wiring connector from the switch and inspect both the connector terminals and the switch terminals for corrosion, bent pins, or loose retention. A small amount of contact cleaner can remove light oxidation. If terminals are significantly corroded or damaged, the connector should be repaired or replaced. Reconnect and retest before replacing the switch.
Step Three: Test the Switch with a Multimeter
Set a multimeter to resistance or continuity mode. With the switch disconnected from the vehicle harness, measure continuity between the switch terminals in both the actuated and unactuated positions. A normally-open switch should show no continuity when the plunger is at rest and continuity when the plunger is depressed. A normally-closed switch shows the opposite.
If the switch does not change state as expected, it has failed internally and should be replaced.
Step Four: Check Circuit Voltage
With the switch reconnected and the ignition on, use a multimeter set to DC voltage to measure the voltage at the switch connector while cycling the parking brake. You should see the voltage change state as the switch actuates. No voltage change indicates a circuit fault. Confirm voltage is present on the supply wire with the switch disconnected; if not, the fault is in the circuit upstream of the switch.
Step Five: Scan for Diagnostic Trouble Codes
Use a scan tool to check for DTCs in the BCM, ABS module, and instrument cluster. Document any codes present before clearing them. Codes pointing to the parking brake switch input circuit confirm the switch or its wiring as the fault source.
Step Six: Road Test After Repair
After replacement, confirm the warning light illuminates when the parking brake is applied and extinguishes when it is fully released. On vehicles with hill-hold, confirm that system operates correctly as well. Clear any codes set during the fault condition and confirm they do not return.
Replacement Considerations
Identifying the Correct Part
Parking brake switch part numbers are vehicle-specific. The correct switch for a given application depends on the make, model, year, engine, and trim level. On platforms that use both a standard parking brake and an electronic parking brake depending on the trim, selecting the wrong switch type will result in a part that physically or electrically does not fit the application.
Always verify the part using the vehicle's VIN when possible. Some parts catalog systems use the VIN to decode the exact production configuration of the vehicle and eliminate fitment ambiguity.
OE Versus Aftermarket
Original equipment switches are manufactured to the tolerances and specifications defined by the vehicle manufacturer. They are the safest choice when reliability and longevity are the priority. For common applications, the price premium over aftermarket options is often modest.
Aftermarket switches vary widely in quality. Reputable aftermarket brands that supply to professional technicians and retailers test their parts for fit, function, and durability. Lower-cost alternatives may use inferior contact materials, looser dimensional tolerances, or housings made from less thermally stable plastics. For a safety-related circuit like the parking brake warning system, quality matters.
Adjustable Versus Non-Adjustable Designs
Some replacement switches for applications that originally used an adjustable design include adjustment slots or mechanisms that allow correct positioning during installation. Confirm whether the replacement requires adjustment and follow the manufacturer's procedure for setting the correct actuation point.
Connector Compatibility
On some applications, the replacement switch may come with a connector pigtail attached rather than using the vehicle's existing connector. This is common when the original connector design is prone to corrosion or damage. If a pigtail is included, the installation will require splicing the pigtail into the vehicle harness. Follow proper splicing techniques and use heat-shrink sealed connectors rather than open crimp splices to prevent moisture intrusion.
Installation Overview
Installation procedures vary by vehicle, but the general process for a lever-mounted switch follows a consistent pattern.
Access to the switch typically requires removing the center console trim or at minimum the trim piece surrounding the parking brake lever. Most center consoles are retained by a combination of clips and screws. The screws are often hidden under small trim caps or beneath the rear seat cushion edge.
With the console trim removed, the parking brake lever assembly and the switch mounted at its base become accessible. The switch is usually retained by one or two screws and has a single wiring connector. Disconnect the connector before removing the switch.
Install the replacement switch, ensure it is fully seated and the retaining screws are tightened to the specified torque if a value is given, and reconnect the connector. If adjustment is required, follow the specific procedure for the application. The typical adjustment goal is to have the switch change state at the point where the parking brake begins to engage, not at full engagement travel.
Reinstall the console trim in the reverse of removal order, connect a scan tool to clear any fault codes, and perform the road test verification described above.
Related Components and Systems
The parking brake switch does not operate in isolation. Understanding the related components helps when a diagnosis is not straightforward.
Brake Fluid Level Sensor
The brake fluid level sensor in the master cylinder reservoir shares the brake warning light with the parking brake switch on most vehicles. If the light stays on and the parking brake switch tests correctly, inspect the brake fluid level and the level sensor before concluding the diagnosis is complete.
ABS and Stability Control Modules
On vehicles where the ABS or stability control module monitors the parking brake switch signal, a fault in the switch can produce ABS or stability control warning lights in addition to the brake warning light. This can cause the driver to focus on the ABS system when the root cause is actually the parking brake switch circuit.
Parking Brake Cable and Rear Brake Adjustment
Correct switch operation depends on the mechanical parking brake system operating within its design parameters. A stretched cable, a broken cable return spring, or rear brakes that are significantly out of adjustment will affect switch actuation timing even when the switch itself is in perfect condition. Always assess the mechanical condition of the parking brake system as part of any switch-related diagnosis.
Body Control Module
On vehicles where the BCM processes the switch signal, a BCM fault can produce symptoms that mimic a parking brake switch failure. If the switch tests correctly with a multimeter but the BCM still reports a fault, suspect the BCM or the wiring between the switch and the BCM input terminal.
BCM faults that affect the parking brake switch input are uncommon but do occur, particularly on higher-mileage vehicles that have experienced water intrusion or on platforms with known BCM reliability issues. Before condemning the BCM, however, always verify the switch and the complete wiring circuit are in good condition. A BCM replacement is a significantly more involved repair than a switch replacement, and misdiagnosis in that direction is costly.
Instrument Cluster
On vehicles where the parking brake switch signal routes directly to the instrument cluster rather than through a BCM, a faulty instrument cluster can prevent the warning light from functioning even when the switch is operating correctly. Cluster faults that affect specific indicator circuits are uncommon, but on high-mileage vehicles with aging electronics they are worth considering if the switch and wiring both test correctly and the light still does not function as expected. In most cases, a cluster fault will also affect other indicators or displays, which makes it easier to identify.
Maintenance and Longevity
The parking brake switch is a low-maintenance component, but a few practices support its longevity and help avoid premature failure.
Avoid spraying water, cleaning solvents, or lubricants directly into the switch area during interior cleaning. Moisture and solvents can contaminate the contact surfaces and accelerate corrosion. If the center console area is being cleaned after a spill or flood event, allow the switch and its connector to dry completely before reconnecting power. A hairdryer on a low setting can help accelerate drying, but heat should not be applied too closely to the plastic switch housing.
If the parking brake mechanism is serviced, make sure the switch actuator geometry is correctly restored after any work that involves removing or repositioning the lever assembly. Incorrect actuator alignment shortens switch life by causing over-travel or off-axis loading on the plunger. Any time the parking brake lever or pedal assembly is removed and reinstalled, verify the switch actuation point and adjust if the application allows.
Using the parking brake regularly rather than allowing it to sit unused for extended periods also benefits the switch indirectly. Parking brakes that are never used tend to develop sticking cables and seized rear brake mechanisms that place higher stresses on the system when it is eventually needed, which can translate into abnormal forces on the switch. Regular use keeps the cables free and the rear brakes exercised, which means the switch operates within normal load parameters.
On older vehicles where the switch is known to be at the end of its expected service life, proactive replacement during a brake system service can prevent an unplanned failure. This is particularly practical if the brake system is being serviced at both axles, which already requires time with the vehicle on a lift and the brake system partially disassembled.
Connector maintenance is equally important as switch maintenance. A small application of dielectric grease inside the wiring connector when the switch is replaced or inspected helps resist moisture intrusion and slows the oxidation of terminal surfaces. Dielectric grease does not conduct electricity, so it does not interfere with the electrical connection, but it does displace moisture and provide a physical barrier against contaminants. This is a simple, low-cost step that can meaningfully extend the service life of the switch and its connector.
Frequently Asked Questions
Can I drive with a failed parking brake switch?
If the switch has failed in the on position, the brake warning light will remain illuminated while driving. The vehicle's braking performance is not directly affected by the switch itself, but driving with the brake warning light on is inadvisable because the light serves as a warning for multiple brake system conditions. A technician cannot immediately tell by looking at the light whether the cause is the switch, low fluid, or a hydraulic fault. Repair the switch promptly to restore the warning system's ability to communicate meaningful information.
If the switch has failed in the off position and the warning light does not illuminate when the parking brake is engaged, the situation is more hazardous. A driver who forgets to release the parking brake will receive no warning. Do not delay this repair.
Will a bad parking brake switch cause the brakes to drag?
No. The switch is an electrical sensor only. It does not control any hydraulic or mechanical function. Brake drag is caused by mechanical or hydraulic issues in the brake system itself, not by the switch. However, if brake drag is present alongside warning light symptoms, assess both the mechanical system and the switch.
Can I bypass the parking brake switch?
Bypassing the switch by jumping the terminals or removing it from the circuit will either keep the warning light on permanently or prevent it from illuminating at all. Either condition reduces the warning system's usefulness and may cause other systems that depend on the switch signal to behave incorrectly. Bypass is not an appropriate repair strategy. Replace the switch.
Is the parking brake switch covered under any standard warranty?
On new vehicles, the parking brake switch is covered under the vehicle's bumper-to-bumper warranty for the warranty period. On used vehicles, coverage depends on any existing extended warranty or service contract. Aftermarket replacement parts typically carry a limited warranty from the parts manufacturer, ranging from 90 days to a lifetime depending on the supplier.
How much does parking brake switch replacement typically cost?
The switch itself is an inexpensive part on most applications, typically ranging from a modest amount for a common domestic application to somewhat more for import or luxury vehicles where OE parts carry a premium. The labor involved in accessing and replacing the switch is usually straightforward on vehicles where the switch is mounted at the base of an accessible handbrake lever. Vehicles with a foot-operated parking brake in an enclosed pedal assembly, or with a more complex console design, may require additional disassembly time.
If the replacement also involves repairing corroded wiring or a damaged connector pigtail, additional labor time should be expected. A professional technician with access to the correct wiring repair tools and materials can perform this work efficiently, but it is not simply a swap of the switch body.
Does the parking brake switch affect the transmission?
On some automatic transmission vehicles, the transmission control module references the parking brake switch signal as part of its logic for certain functions, such as preventing engagement of a specific gear mode when the parking brake is applied or releasing torque converter lockup during low-speed maneuvering. A parking brake switch that is stuck in the engaged position could theoretically interfere with these functions, though modern transmission control systems typically apply significant additional logic before taking any action based on a single input. If unusual transmission behavior accompanies parking brake warning light symptoms, document both and provide the full picture to the diagnosing technician.
Can a parking brake switch cause the vehicle to fail an inspection?
In jurisdictions where safety inspections include a check of the warning light system, an inoperative or continuously illuminated brake warning light can result in a failed inspection. Since the parking brake switch contributes to the brake warning light, a switch failure can directly affect inspection results. Repair should be completed before the inspection appointment when possible.
How long does a parking brake switch typically last?
There is no fixed service interval for parking brake switch replacement because longevity depends on how frequently the parking brake is used, the environmental conditions the vehicle operates in, and the quality of the switch. In ideal conditions, an original equipment switch on a vehicle where the parking brake is used regularly but not abused can last the lifetime of the vehicle. In harsh conditions or on vehicles with high-quality aftermarket replacement switches installed, service life is typically measured in years rather than months.
Status in New Databases
PIES/PCdb: PartTerminologyID 4600, Parking Brake Switch
PIES 8.0 / PCdb 2.0: No change in PartTerminologyID or terminology label
Summary
The parking brake switch is a small electrical component with an important role in the vehicle's safety warning system. It monitors the applied or released state of the parking brake mechanism and signals the instrument cluster and related control modules accordingly. When it fails, the result is typically a brake warning light that behaves incorrectly, which can mask other brake system faults or leave the driver without a warning when the parking brake is engaged.
Accurate diagnosis before replacement is essential. Verify the mechanical system is functioning correctly, inspect the wiring and connector, and test the switch directly with a multimeter before ordering a replacement. Select the correct part for the specific vehicle application, paying attention to the switch design, connector type, and whether adjustment will be required during installation.
PartTerminologyID 4600, Parking Brake Switch, covers the full range of mechanical switch designs used in this application. Matching the replacement to the vehicle's specific configuration ensures correct fit, correct function, and a warning system that drivers and technicians can rely on.