Dimmer Relay (PartTerminologyID 3264): Where Circuit Function Identification Across Headlight Beam Switching, Instrument Panel Dimming, and Interior Light Control Determines Correct Fitment
Written by Arthur Simitian | PartsAdvisory
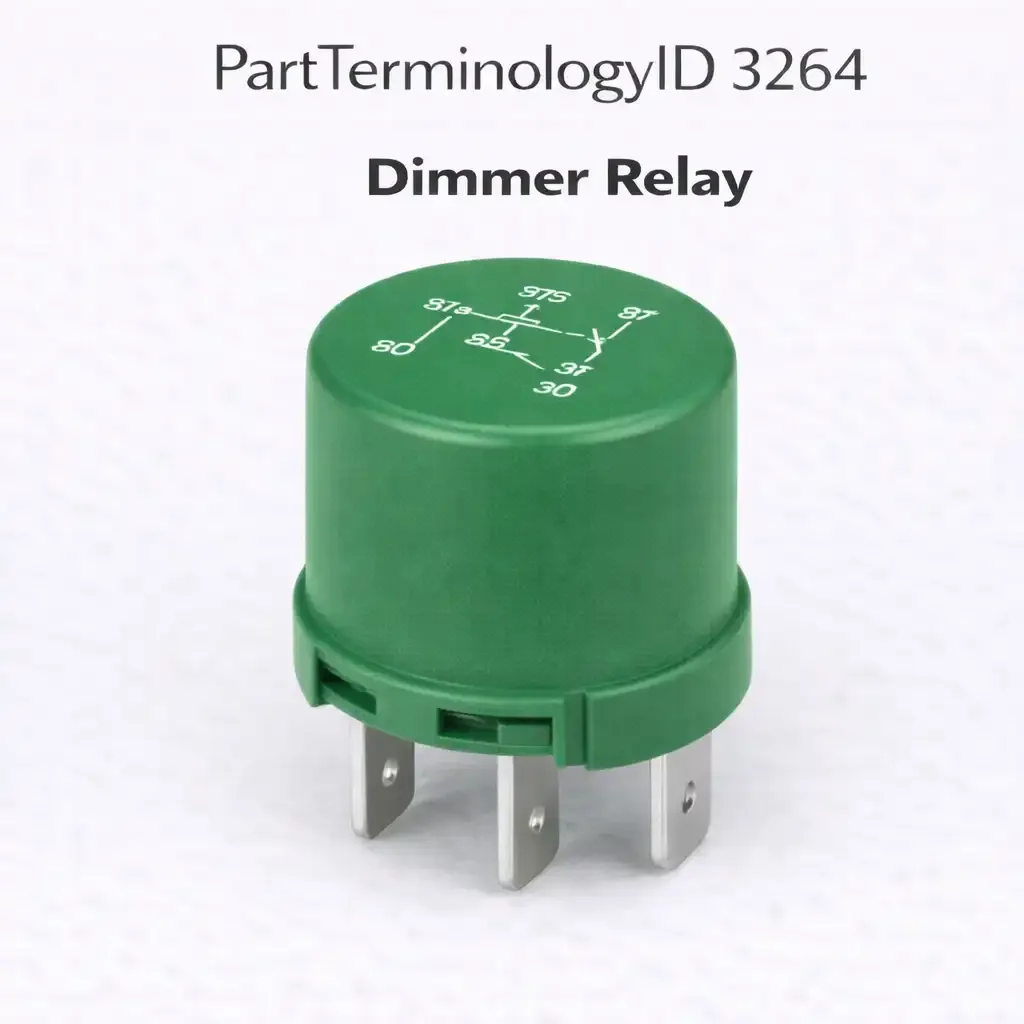
PartTerminologyID 3264, Dimmer Relay, is the relay that controls a dimming or beam-switching function in the vehicle's lighting system. That definition is intentionally broad because the term dimmer relay describes at least three functionally distinct circuit applications that require different relay specifications and different diagnostic approaches. The three primary applications are: the headlight high/low beam switching relay that routes high current to either the high beam or low beam filament circuit based on the driver's beam selection; the instrument panel dimming relay that controls power to the instrument cluster illumination or to the potentiometer circuit that varies cluster illumination brightness; and the interior light dimming relay that controls power delivery to courtesy and cabin lighting circuits at reduced brightness during specific operating conditions. Each of these three applications requires a listing that identifies which dimmer function is being served, because the contact current rating, coil activation source, and failure symptom differ across all three.
The headlight high/low beam switching application carries the highest contact current requirement of the three. Sealed beam headlamps draw 4.5 to 7.5 amperes per lamp, and a vehicle with four sealed beam headlamps switches up to 30 amperes through the dimmer relay contacts when transitioning between high and low beam. Halogen headlamps reduce this load to 3 to 5 amperes per lamp, but the switching demand on a vehicle with four halogen lamps still reaches 20 amperes. The instrument panel dimming relay carries a much lower current load, typically under 5 amperes total for all cluster illumination circuits. The interior light dimming relay falls between these two extremes depending on the number and type of courtesy lamps controlled. A relay specified for instrument panel dimming that is installed in the headlight switching position will fail rapidly from contact overload. A relay specified for headlight switching that is installed in the instrument panel dimming position will function correctly but represents unnecessary cost.
What the Dimmer Relay Does
Headlight high/low beam switching architecture
The headlight dimmer relay in beam-switching applications uses a changeover contact configuration, meaning it has both normally open and normally closed contacts connected to the same common terminal. In the de-energized state, the common terminal connects to one beam circuit, typically low beam. When energized by the driver's high beam switch, the common terminal disconnects from the low beam circuit and connects to the high beam circuit. This changeover architecture means that a relay with stuck-open coil or broken coil winding causes the vehicle to operate on whichever beam circuit the contacts default to in the de-energized state. A relay with welded contacts causes the vehicle to be locked to whichever beam was active when the contacts welded, and beam switching becomes impossible. Both failure modes are safety-relevant because one leaves the vehicle without high beams and the other leaves the vehicle locked on high beams with no ability to dim for oncoming traffic.
Instrument panel dimming relay and BCM integration
The instrument panel dimming relay on older vehicles controls the power supply to the instrument cluster illumination bulbs, with the dimmer switch varying the voltage to the relay coil or the resistance in the lamp circuit to change brightness. On vehicles from approximately 1990 onward, instrument cluster dimming is increasingly handled by the BCM through pulse-width modulation of the lamp circuit, and a separate dimming relay may not exist. On these applications, a dimming fault is a BCM output fault or a wiring fault, not a relay fault. Listings under PartTerminologyID 3264 for instrument panel dimming applications must confirm that a standalone dimming relay exists in the circuit before publishing fitment claims for post-1990 vehicles.
Interior light dimming and theater-dim architecture
Some vehicles use a theater-dim function where interior courtesy lights fade gradually to off after the door is closed rather than extinguishing abruptly. This function may be implemented through a dedicated dimming relay with a capacitor-controlled decay circuit, through a BCM-controlled PWM output, or through a separate interior lamp controller module. A standalone theater-dim relay is replaceable as a discrete component. A BCM-controlled theater-dim function is not addressable through relay replacement. The listing must identify whether the application uses a standalone relay-based theater-dim circuit or a module-controlled dimming architecture before fitment claims are published.
Top Return Scenarios
Scenario 1: "Stuck on high beams, cannot switch to low"
The headlight dimmer relay contacts have welded in the high beam position. The driver's beam switch operates correctly and applies the activation signal to the relay coil, but the contacts cannot transition because they are welded. This failure mode is accelerated by switching high current loads at inrush, particularly on vehicles where the headlights are switched while already at full brightness. The welded contact failure is characteristic of a relay whose contact current rating was marginally adequate for the headlight load and has degraded over time.
Prevention language: "Contact current rating: [X] amperes. This headlight dimmer relay is rated for the full inrush and steady-state current of the headlight circuit on this application. Do not substitute a lower-rated relay. Marginal contact ratings on this high-current switching application cause welded contact failure and loss of beam switching."
Scenario 2: "Instrument cluster illumination always at full brightness, dimmer knob has no effect"
The instrument panel dimming relay is stuck closed, delivering full voltage to the cluster illumination circuit regardless of the dimmer control input. The dimmer switch signal is present at the relay coil terminal but the contacts do not vary their state in response to coil energization variations because the contacts are welded in the closed position.
Prevention language: "Symptom: cluster illumination at constant full brightness with no dimmer response indicates the dimming relay is stuck closed. Symptom: cluster illumination off or at minimum brightness with no dimmer response indicates the relay is stuck open or the supply circuit is open. Confirm which failure direction is present before ordering."
Scenario 3: "Interior lights do not fade, they cut off immediately when door closes"
The theater-dim relay's capacitor decay circuit has failed. The relay de-energizes immediately on door close rather than decaying gradually. On some applications this symptom is caused by a failed capacitor in the relay module rather than a failed relay contact, and the relay module must be replaced as a unit rather than just the relay element.
Prevention language: "Theater-dim relay architecture: [standalone relay with integrated capacitor decay circuit / BCM-controlled PWM]. This application uses a [architecture] for interior light fading. If the lights cut off abruptly rather than fading, the relay module including the capacitor decay circuit requires replacement."
Scenario 4: "New relay installed, headlights still stuck on high beam"
The replacement relay was correctly installed but the high beam switch itself has failed in the activated position, continuously energizing the relay coil and holding the contacts in the high beam state. The relay is functioning correctly but the activation signal from the failed switch never releases. The symptom is identical to a relay stuck in the energized state.
Prevention language: "Before replacing the dimmer relay, test the beam switch signal at the relay coil terminal. If the coil activation signal is continuously present regardless of switch position, the multifunction switch or stalk switch is failed in the high beam position, not the relay."
Listing Requirements
PartTerminologyID: 3264
circuit function: headlight beam switching, instrument panel dimming, or interior light dimming (mandatory)
contact current rating (mandatory for headlight beam switching applications)
contact configuration: changeover for beam switching, normally open or normally closed for dimming (mandatory)
architecture confirmation for instrument panel and interior dimming: standalone relay versus BCM-controlled (mandatory)
theater-dim module note for interior fading applications (mandatory where applicable)
OEM part number cross-reference (mandatory)
Catalog Checklist for ACES/PIES Teams
PartTerminologyID = 3264
require circuit function identification in every listing (mandatory)
require contact current rating for headlight beam switching applications (mandatory)
require contact configuration disclosure (mandatory)
prevent instrument panel dimming listing on BCM-PWM applications where no standalone relay exists
prevent theater-dim relay listing on BCM-controlled interior dimming applications
differentiate from Headlight Relay (PartTerminologyID 3400): the headlight relay supplies power to the entire headlight circuit; the dimmer relay switches between high and low beam within the already-powered circuit
require OEM relay position label or circuit diagram reference (strongly recommended)
FAQ (Buyer Language)
What is the difference between the dimmer relay and the headlight relay?
The headlight relay (PartTerminologyID 3400) provides the main power supply to the headlight circuit, allowing the headlights to turn on and off. The dimmer relay switches the already-powered headlight circuit between high beam and low beam filaments. Both must function for the headlights to operate normally. A failed headlight relay results in no headlights at all. A failed dimmer relay results in headlights that work but cannot switch between high and low beam.
My instrument cluster goes dark when I turn the headlights on. Is this the dimmer relay?
The instrument cluster illumination is designed to come on with the headlights, not to go dark. If the cluster goes dark when headlights are activated, the dimming circuit may have a wiring fault causing the illumination supply to be interrupted rather than activated. Test the illumination supply voltage at the cluster illumination input terminal with headlights on before diagnosing the dimmer relay. A wiring fault between the dimmer relay and the cluster is more common than a relay failure that causes this specific symptom pattern.
Can I use a standard ISO relay for the headlight dimmer function?
Only if the circuit uses an ISO-compatible changeover relay configuration and the contact current rating matches the headlight load. Headlight beam switching relays are often changeover relays with three load terminals rather than the two-terminal configuration of a standard normally open ISO relay. Substituting a standard normally open ISO relay in a changeover position will function only for one beam direction and will fail to supply the other beam circuit entirely.
Why do my interior lights cut off immediately instead of fading?
Abrupt cutoff instead of fade indicates the theater-dim relay's capacitor circuit has failed or the relay module has lost the capacitor decay circuit entirely. On applications where this function is relay-based, replace the theater-dim relay module as a unit. On BCM-controlled applications, the fade function is a BCM software output and a BCM fault code scan is the appropriate diagnostic path.
What Sellers Get Wrong About PartTerminologyID 3264
The most common error is treating the dimmer relay as a single undifferentiated component when the term covers at least three distinct circuit functions with different contact ratings, contact configurations, and diagnostic approaches. A headlight beam switching relay listed under the same product as an instrument panel dimming relay will generate returns because the contact current rating appropriate for one is excessive or insufficient for the other, and the contact configuration appropriate for changeover beam switching is incorrect for single-direction instrument dimming control. Every listing must identify the specific circuit function the relay serves.
The second error is failing to confirm the standalone relay architecture before publishing fitment claims for post-1990 instrument panel and interior dimming applications. BCM-integrated dimming functions became standard on most passenger car platforms through the 1990s, and many applications that appear to need a standalone dimming relay based on year and model cross-references are actually BCM-controlled. Publishing fitment claims that include these applications generates a steady stream of buyers who find no relay socket for the part they ordered. Every application in the fitment range must be confirmed against the wiring diagram before the listing is published.
The third error is omitting the headlight relay differentiation note. Many buyers who cannot switch between high and low beam search for a headlight relay replacement rather than a dimmer relay replacement because the term headlight relay is more familiar. A listing for PartTerminologyID 3264 that does not cross-reference PartTerminologyID 3400 and explain the functional boundary loses buyers who would have purchased correctly if they understood which relay serves which function. The cross-reference note is both a service to the buyer and a conversion tool for the seller.
Cross-Sell Logic
Headlight Relay (PartTerminologyID 3400): the main headlight power supply relay; buyers diagnosing headlight failures should check both the headlight relay and the dimmer relay since either can cause beam-related symptoms
Multifunction Switch / Turn Signal Stalk: the beam switch that activates the dimmer relay coil; a failed stalk switch can mimic a stuck dimmer relay by continuously energizing or failing to energize the coil
Headlight Motor Relay (PartTerminologyID 3408): for vehicles with concealed headlamps where the headlight motor relay controls lamp deployment independently of the dimmer function
Application Range and Fitment Guidance for PartTerminologyID 3264
Headlight beam switching dimmer relay applications are present from the early adoption of relay-switched headlight systems in the mid-1970s through the present on most vehicles that use relay-controlled headlight circuits. The transition from floor-mounted dimmer switches to stalk-mounted multifunction switches in the late 1970s and early 1980s coincided with the introduction of relay-based beam switching because the stalk switch carries only the low-current coil signal while the relay handles the high-current headlight load. Applications before this transition used the floor-mounted dimmer switch to carry the full headlight current directly, without a relay stage. A listing that extends the fitment range backward into the pre-relay era will generate returns from buyers with floor-switch vehicles whose headlight circuit has no relay socket.
Instrument panel dimming relay applications are concentrated in the period from approximately 1975 through 1995. After 1995, BCM-controlled PWM dimming became standard on most domestic and import platforms, progressively eliminating standalone dimming relays from the instrument cluster circuit. European platforms made this transition earlier, with most German manufacturers adopting BCM-controlled cluster dimming by the early 1990s. Japanese domestic market vehicles sold in North America made the transition more gradually, with some platforms retaining standalone dimming relay architectures through 2000. The fitment range for instrument panel dimming applications must be confirmed against the wiring diagram for each included model year because the architecture transition was not simultaneous across platforms and trim levels.
Final Take for PartTerminologyID 3264
Dimmer Relay (PartTerminologyID 3264) is the circuit function relay where the absence of function-specific identification in the listing is the primary source of returns, misdiagnosis, and buyer dissatisfaction. The term dimmer relay covers headlight beam switching, instrument panel dimming, and interior light fading in three distinct electrical architectures with different contact ratings, contact configurations, and diagnostic procedures. A listing that does not identify which of these three functions it serves cannot route buyers to the correct part regardless of how accurate the year, make, and model fitment data is. The fitment range is necessary but not sufficient. The circuit function is the attribute that makes the fitment range actionable.
The headlight beam switching application is the most safety-relevant of the three because the failure modes of a stuck-open or stuck-closed changeover relay directly affect the driver's ability to adapt lighting to road and traffic conditions. A vehicle that cannot dim from high beam to low beam when approaching oncoming traffic represents a specific hazard that a correctly specified and correctly installed dimmer relay prevents. The contact current rating for this application is not a secondary specification. It is the primary determinant of relay service life under the repeated high-current switching demands of the headlight circuit.
Sellers who identify circuit function, specify contact current rating for beam switching applications, and confirm standalone relay architecture for dimming applications eliminate the majority of returns on this PartTerminologyID and provide buyers with listings that can be evaluated against their specific application before ordering rather than after installation.
What Sellers Get Wrong About PartTerminologyID 3264 (Extended)
A fourth error specific to headlight beam switching applications is failing to confirm whether the vehicle uses a relay-based beam switching circuit or a solid-state beam switching module. From approximately 2005 onward, many platforms replaced the electromechanical dimmer relay with a solid-state headlight control module that uses transistor switching rather than relay contacts to route high beam and low beam current. A listing that publishes fitment claims extending into solid-state module applications will generate returns from buyers whose vehicles have no relay socket for the listed component. The wiring diagram for every application in the headlight dimmer relay fitment range must be confirmed to use a relay-based switching architecture before the listing is published.
A fifth error is failing to specify the coil activation source for the dimmer relay. The beam switching relay coil on most applications is activated by the low-current signal from the multifunction switch stalk, not by the full headlight current. The stalk carries only 0.5 to 1 ampere to the relay coil, and the relay contacts carry the full headlight current. A relay with a coil that requires more than 1 ampere for pull-in will not reliably activate from a multifunction switch circuit designed for low-current coil loads. The coil pull-in current specification must be matched to the switch circuit's available output current on applications where the switch directly drives the relay coil without an intermediate driver circuit.
The instrument panel dimming application adds a sixth error that is specific to analog dimmer potentiometer systems. On these systems, the dimmer relay coil voltage varies continuously with the potentiometer position rather than switching between zero and supply voltage. The relay is designed to operate in a proportional mode where partial coil energization produces intermediate contact positions that vary lamp brightness by modulating the contact resistance rather than fully switching the circuit. A relay with standard normally-open contact design cannot operate in this proportional mode. Only relays specifically designed for the proportional dimming circuit on these applications will produce graduated brightness variation. Standard relay substitution on proportional dimming circuits results in full-on or full-off lamp behavior with no intermediate brightness control.
Dimmer Relay Symptom Summary
To assist buyers in confirming the correct diagnosis before ordering, the failure symptoms for each dimmer relay application type can be summarized as follows. For the headlight beam switching application, a relay stuck open results in no response to the high beam switch and the vehicle operating permanently on whichever beam state the contacts default to in the de-energized state. A relay stuck closed results in the vehicle being locked on high beam with no ability to dim. A relay with high contact resistance causes flickering or intermittent beam switching under vibration. For the instrument panel dimming application, a relay stuck open causes the instrument cluster to be fully dark at all dimmer settings. A relay stuck closed causes the cluster to be at full brightness at all dimmer settings. For the interior theater-dim application, a relay module with a failed capacitor causes abrupt cutoff instead of gradual fade to dark. Each symptom pattern corresponds to a specific failure mode that can be verified by relay bench test before the replacement is ordered.