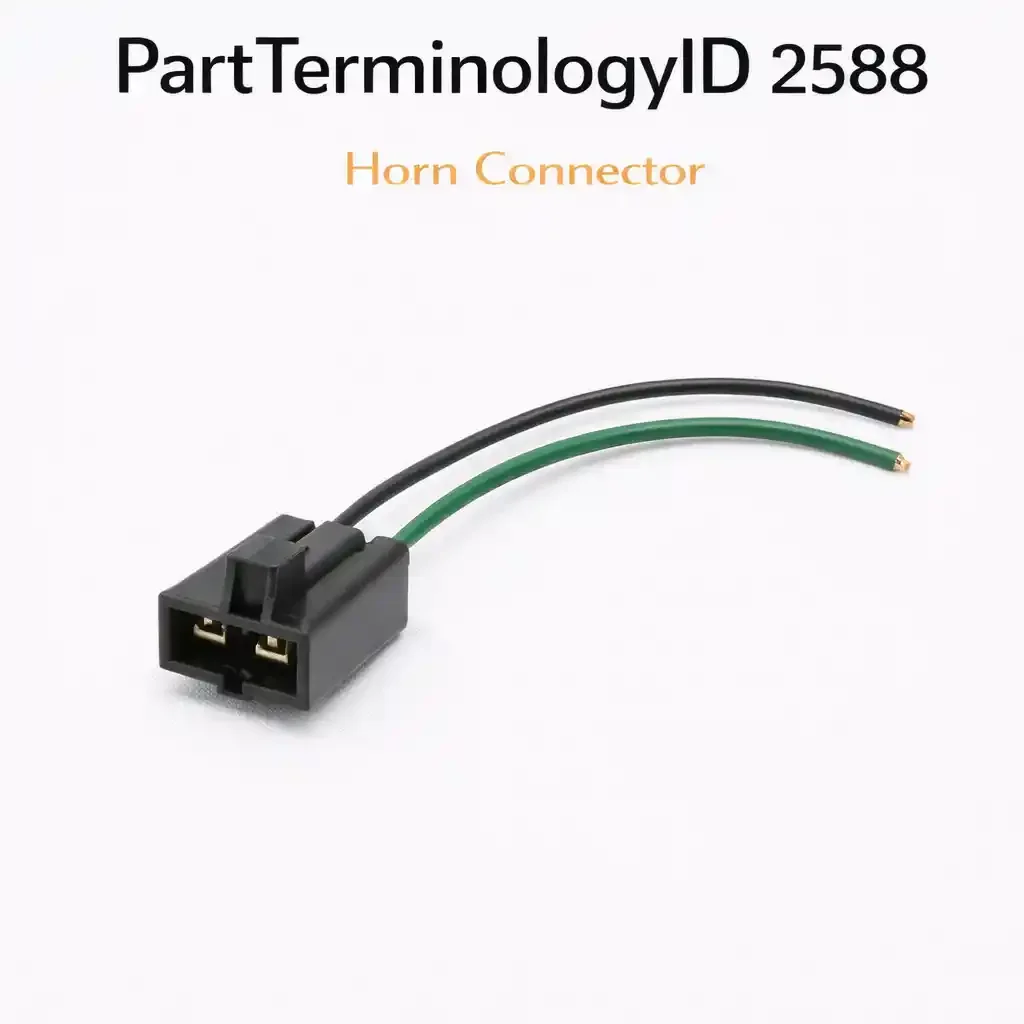
Horn Connector (PartTerminologyID 2588) The Complete Guide
When most people think about their vehicle's horn, they picture the button on the steering wheel and the loud blast of sound that follows. But between those two points lies a surprisingly intricate system of wiring, relays, and connectors that must all work in harmony. Among the most critically overlooked components in this chain is the horn connector - designated in the Auto Care Association's standard parts terminology as PartTerminologyID 2588. This small but mighty electrical component is the unsung hero responsible for completing the circuit that makes your horn function reliably, every single time.
In this comprehensive guide, we will explore everything you need to know about the horn connector: what it is, how it works, why it fails, and how to diagnose, replace, and maintain it. Whether you are an automotive technician, a parts professional, or a vehicle owner trying to understand why your horn has stopped working, this post is your one-stop resource.
What Is a Horn Connector? (PartTerminologyID 2588)
The horn connector, as catalogued under PartTerminologyID 2588 in the Auto Care Association's ACES (Aftermarket Catalog Exchange Standard) and PIES (Product Information Exchange Standard) systems, is an electrical connector specifically designed to plug into a vehicle's horn unit. Its primary function is to create a secure, weatherproof electrical junction between the vehicle's wiring harness and the horn itself.
At its core, the horn connector consists of a plastic housing, one or more metal terminal pins, and often a locking tab or clip to ensure the connector stays firmly seated even under the vibration generated during horn operation. The connector plugs directly into the horn's electrical port, completing the circuit between the vehicle's relay and the horn's electromagnet coil.
The standardized terminology designation (2588) ensures that parts professionals across the automotive aftermarket industry can identify and catalog this component consistently, regardless of the vehicle make, model, or year. When a cataloger, distributor, or retailer lists a horn connector under this terminology ID, it communicates a clear, universally understood definition of the part's function and application.
The Role of the Horn Connector in the Vehicle's Electrical System
To appreciate the significance of the horn connector, it helps to understand the complete horn circuit. In most modern passenger vehicles, the horn system is composed of several interrelated components working together.
The driver initiates the circuit by pressing the horn button on the steering wheel. This sends a low-current signal through the clock spring (the coiled electrical connector that allows the steering wheel to rotate while maintaining electrical continuity) to the horn relay. The relay, acting as a switch, then closes the high-current circuit. Current flows from the battery through the fuse box, through the relay, and down to the horn unit - with the horn connector serving as the final electrical bridge between the wiring harness and the horn itself. The horn's electromagnet vibrates the diaphragm at high frequency, generating the familiar sound. The current then flows to ground, completing the circuit.
Without a properly functioning horn connector, even if every other component in this system is in perfect condition, the circuit cannot be completed and the horn will not sound. This is precisely why a faulty, corroded, or loose horn connector is one of the most common - and most commonly misdiagnosed - causes of horn failure.
Types and Configurations of Horn Connectors
Horn connectors come in a variety of configurations to accommodate the diversity of horn designs and vehicle manufacturers' wiring standards. While they all serve the same fundamental purpose, the specific design can vary significantly from one application to the next.
Single-Pin Connectors
Many horns, particularly older or simpler designs, use a single-pin connector. In these systems, power is delivered through one terminal and the horn body itself is grounded directly to the vehicle chassis. This ground-through-mount design simplifies the connector but requires good chassis contact at the horn mounting point.
Two-Pin Connectors
Many modern horns use a two-pin connector that carries both the positive power and a dedicated ground wire. This design is preferred in applications where reliable grounding through the body cannot be guaranteed, such as when the horn is mounted on plastic brackets or in locations prone to corrosion.
Weatherproof and Sealed Connectors
Given that most horns are located in the engine compartment near the front fascia - an area exposed to rain, road spray, dirt, and temperature extremes - many OEM and aftermarket horn connectors incorporate weatherproofing features. These include rubber seals around the terminal pins, sealed housings, and moisture-resistant materials that prevent water ingress and corrosion buildup at the terminal contact points.
OEM vs. Aftermarket Pigtail Connectors
In the repair context, horn connectors are often supplied as part of a pigtail assembly - a short section of wire with the connector pre-installed on one end and bare wire leads on the other. These pigtail connectors allow technicians to splice a new, clean connector into the vehicle harness when the original connector has been damaged, melted, or corroded beyond repair. Aftermarket pigtail assemblies under PartTerminologyID 2588 are widely available and represent one of the most practical solutions for connector replacement without the cost of replacing an entire wiring harness section.
Common Causes of Horn Connector Failure
Understanding why horn connectors fail is key to accurate diagnosis and effective repair. Several factors contribute to connector degradation over a vehicle's service life.
Corrosion and Oxidation
This is the single most common cause of horn connector failure. The metal terminals inside the connector are susceptible to oxidation when exposed to moisture, road salt, and humidity. Corrosion increases electrical resistance at the contact point, which can cause intermittent horn operation, a weak or distorted horn sound, or complete horn failure. In severe cases, the corrosion can cause the terminal to disintegrate entirely.
Physical Damage
The horn connector's location in the front of the engine compartment makes it vulnerable to impact damage. Debris kicked up from the road, damage from front-end collisions, and rough handling during unrelated repair work can crack the connector housing, bend or break terminal pins, or compromise the connector's locking mechanism, allowing it to work loose over time.
Heat Damage and Melting
Excessive current draw - which can occur if the horn develops an internal fault or if there is a wiring issue elsewhere in the circuit - can cause the connector to overheat. The plastic housing can melt or deform, and the terminal pins can fuse or become permanently oxidized. In extreme cases, the connector may cause a localized electrical fire.
Connector Fatigue and Wear
Over time, the locking tabs on many horn connectors can fatigue and lose their grip, particularly if the connector has been disconnected and reconnected multiple times during service work. A connector that does not seat properly can vibrate loose, causing intermittent contact issues. Similarly, the terminal pins themselves can lose tension over time, reducing the firmness of their contact with the horn's electrical ports.
Chemical Contamination
Oil, coolant, and other fluids can seep into the connector housing, contaminating the terminal contacts and disrupting electrical continuity. Even cleaning products used during engine bay detailing can leave residues that interfere with connection quality if they penetrate the connector.
Diagnosing a Faulty Horn Connector
When a customer or vehicle owner reports horn problems, the horn connector should be one of the first components inspected. A systematic diagnostic approach will help isolate the connector as the source of the problem or rule it out in favor of other components.
Visual Inspection
Begin with a thorough visual inspection of the connector and surrounding wiring. Look for signs of corrosion (white or green powdery deposits) on the terminal pins or inside the housing, cracks or melting in the plastic housing, broken or missing locking tabs, and evidence of water intrusion or fluid contamination. Also inspect the wiring leading to and from the connector for chafing, cracking, or damage.
Physical Seating Check
With the ignition off, gently tug on the connector to verify it is fully seated and locked. A connector that pulls loose easily is not providing reliable contact. Disconnect and reconnect the connector to confirm the locking tab engages with a distinct click. If the connector feels loose even when fully seated, the locking mechanism may be worn and the connector should be replaced.
Voltage Drop Testing
Using a digital multimeter, measure the voltage drop across the connector while the horn is being activated. A healthy connector should show minimal voltage drop - typically less than 0.1 volts. A reading significantly above this threshold indicates high resistance at the connection, confirming the connector is the source of the problem. Anything above 0.5 volts drop across a single connector warrants replacement.
Continuity and Resistance Testing
With the connector disconnected, use a multimeter set to the resistance (ohm) setting to check continuity through each terminal pin. A reading close to zero ohms indicates a good terminal. High resistance or an open circuit reading indicates corrosion or a broken terminal pin that must be addressed.
How to Replace a Horn Connector
Replacing a horn connector is one of the more straightforward electrical repairs on a vehicle, though it does require care and attention to detail to ensure a durable, reliable repair. Here is a step-by-step overview of the process.
• Safety First: Disconnect the negative battery terminal before beginning any electrical repair work. This prevents accidental horn activation and eliminates the risk of short circuits during the repair.
• Locate the Horn: The horn (or pair of horns) is typically found behind the front grille or bumper, in the engine compartment. Consult a vehicle-specific repair manual or wiring diagram if the location is not immediately obvious.
• Disconnect the Old Connector: Press the locking tab and firmly pull the connector straight out from the horn. Avoid pulling on the wires themselves. If the connector is seized due to corrosion, use electrical contact cleaner to help break it loose.
• Inspect the Wiring: Before installing the new connector, inspect the wiring harness back to the nearest harness anchor or junction. If the wires are damaged, they must be repaired before the new connector will provide a lasting fix.
• Install the Pigtail Assembly: If using a pigtail connector (the most common repair method), strip the ends of the pigtail's wire leads and splice them to the vehicle's existing wiring using solder and heat-shrink tubing. Crimp-style butt connectors are an acceptable alternative, but soldering provides a more durable connection with lower resistance.
• Reconnect and Test: Plug the new connector onto the horn, ensure the locking tab engages, reconnect the battery, and test the horn for proper operation. A clear, strong horn sound confirms a successful repair.
Selecting the Right Replacement Horn Connector
When sourcing a replacement horn connector for a specific vehicle, several factors should guide the selection process to ensure proper fit and long-term reliability.
Vehicle Application Data
Using the vehicle's year, make, model, and engine configuration, look up the appropriate horn connector in a catalog system that uses PartTerminologyID 2588 as the classification. This ensures the connector housing, terminal configuration, and wire gauge are appropriate for the specific vehicle's OEM wiring harness design.
Terminal Count and Configuration
Verify whether the vehicle's horn uses a single-pin or two-pin connector. Installing a connector with the wrong terminal configuration will prevent proper connection and may damage the horn or wiring. Cross-referencing the part number or using a connector identification guide can help confirm compatibility.
Wire Gauge and Material
The pigtail wires on the replacement connector should match the wire gauge of the vehicle's original harness wiring - typically 14 to 18 AWG for horn circuits. Using undersized wire can create a resistance bottleneck or even a fire risk, while oversized wire may be difficult to splice neatly.
Quality and Environmental Rating
Given the horn connector's exposure to harsh underhood conditions, choosing a connector with appropriate environmental ratings is important. Look for connectors with sealed or weather-resistant housings, tin-plated or gold-plated terminals for corrosion resistance, and high-temperature rated plastic housings that will not warp or become brittle in engine compartment temperatures.
Preventive Maintenance for Horn Connectors
While horn connectors are not typically part of scheduled maintenance intervals, a small amount of proactive attention can dramatically extend their service life and prevent unexpected horn failure - which, in addition to being inconvenient, may also be a safety concern and a regulatory violation in many jurisdictions.
• Periodic Inspection: During routine service appointments, particularly oil changes or brake inspections that bring a technician into the engine compartment, a quick visual check of the horn connector can catch developing problems early.
• Dielectric Grease Application: Applying a small amount of dielectric grease to the terminal pins before connecting the horn connector creates a moisture-resistant barrier that significantly slows corrosion. This is particularly recommended in regions with high humidity, heavy rainfall, or road salt use.
• Electrical Contact Cleaner: If light corrosion is detected early, spraying the connector terminals with electrical contact cleaner and gently working the connector on and off several times can restore good contact without requiring full replacement.
• Harness Inspection After Collision Repairs: Front-end collision damage frequently damages horn wiring and connectors even when the horn itself survives intact. Always inspect the horn connector as part of the post-repair checkout process.
The Importance of Part Terminology Standardization
The designation of the horn connector as PartTerminologyID 2588 is more than just a catalog number - it reflects a critical industry-wide effort to standardize the language of automotive parts across the entire aftermarket supply chain.
The Auto Care Association's Part Terminology standard (also known as the PIES Part Terminology standard) assigns a unique numeric ID to every distinct type of automotive part in the aftermarket catalog. This allows parts manufacturers, distributors, retailers, and catalog providers to speak the same language when identifying parts, regardless of brand, private label designation, or regional naming conventions. A horn connector listed by a premium brand supplier and a value-line supplier can both be accurately identified and compared when both are cataloged under PartTerminologyID 2588.
For parts professionals and counter sales representatives, familiarity with standardized terminology IDs like 2588 enables faster, more accurate parts lookup, reduces the risk of selling the wrong part, and improves the overall customer experience. For e-commerce and catalog platforms, standardized IDs enable clean, accurate fitment data and better search and matching performance.
Horn Connector in the Context of Modern Vehicle Complexity
As vehicles have grown more technologically complex, even simple systems like the horn have evolved. Many modern vehicles integrate the horn into broader driver assistance and safety systems, including collision warning alerts, remote keyless entry confirmation beeps, panic alarm functions, and even advanced driver assistance system (ADAS) proximity warnings. In some vehicles, the horn circuit is now monitored by the body control module (BCM), which can detect circuit faults and generate diagnostic trouble codes (DTCs) when a problem is detected.
In this context, a faulty horn connector can do more than just silence the horn - it can trigger warning lights, disable certain safety alert functions, or generate confusing fault codes that complicate diagnosis. Recognizing the horn connector (PartTerminologyID 2588) as a potential root cause when BCM-related horn circuit codes appear can save significant diagnostic time and prevent unnecessary replacement of more expensive components like the BCM itself.
Frequently Asked Questions About Horn Connectors
Can I drive without a working horn?
In most jurisdictions, a functional horn is a legal requirement for vehicles operated on public roads. A failed horn connector that renders the horn inoperative should be treated as a priority repair, not merely a convenience issue.
Is the horn connector the same as the horn harness?
Not exactly. The horn connector (PartTerminologyID 2588) refers specifically to the electrical connector assembly that interfaces with the horn unit. A horn harness is a broader term that may refer to the entire wiring assembly running from the fuse box or relay to the horn, which may include the connector as one component within the assembly.
My horn worked fine, then stopped suddenly. Could it be the connector?
Sudden horn failure - as opposed to gradual weakening - is often caused by the connector working loose due to vibration or a failed locking tab rather than gradual corrosion, which tends to produce intermittent or weak operation before complete failure. A sudden loss of horn function warrants an immediate check of the connector seating before investigating other components.
How long does a horn connector last?
In a well-maintained vehicle operated in a mild climate, a horn connector can often last the lifetime of the vehicle. The connector is a simple component, but its durability depends less on mileage and more on where it lives on the car and what it is exposed to. Many horn connectors sit near the front bumper, behind the grille, or low in the engine bay, which puts them in the direct path of water spray, dirt, road grime, and vibration. If the connector remains sealed, properly latched, and the terminal plating stays clean, it can function reliably for decades.
In harsh environments, connector life can be significantly shorter. High humidity, coastal air, frequent rain, and especially heavy road salt exposure accelerate terminal corrosion and can damage seals. Extreme heat and large temperature swings contribute to plastic aging, seal shrinkage, and loss of terminal tension over time. Once moisture gets inside the connector cavity, the terminal contact surfaces start to oxidize, raising resistance. Higher resistance reduces horn output, creates intermittent operation, and can eventually lead to overheating at the contact point. Vibration and movement at the front end can also cause “fretting” corrosion, where tiny micro-movements slowly wear the terminal surfaces and degrade conductivity even if the connector looks fine externally.
Proactive maintenance can extend service life substantially. Periodic inspection for corrosion, looseness, or cracked seals helps catch problems early. Applying dielectric grease correctly (a light protective film to discourage moisture intrusion, not a glob that prevents full seating) can improve long-term reliability. If the latch is weak, the connector fits loosely, or there is visible green/white corrosion, replacing the connector before failure is often cheaper than dealing with repeated horn issues later.
Conclusion
The horn connector, catalogued under PartTerminologyID 2588, may be one of the smallest components in a vehicle's electrical system, but its role is anything but insignificant. A failed horn connector can render an essential safety device inoperative, generate confusing fault codes in modern vehicles, and lead to misdiagnosis and unnecessary parts replacement when not properly identified.
By understanding the horn connector's function within the broader horn circuit, recognizing the common failure modes that affect it, applying systematic diagnostic techniques, and selecting quality replacement parts catalogued under the correct Part Terminology ID, technicians and parts professionals alike can ensure fast, accurate, and lasting repairs. And for vehicle owners, this guide provides the foundational knowledge to understand what is happening under the hood when that familiar honk goes silent.
The next time a customer comes in complaining that their horn isn't working, remember to check PartTerminologyID 2588 - sometimes the smallest component makes the biggest difference.
Part Reference: PartTerminologyID 2588 - Horn Connector | Source: Auto Care Association Parts Terminology Standard