CV Joint Boot Band (PartTerminologyID 2280): Where Band Type, Diameter, and Width Determine Whether the Boot Seal Holds Under Articulation
Written by Arthur Simitian | PartsAdvisory
PartTerminologyID 2280, CV Joint Boot Band, is a clamp that secures the CV joint boot to the axle shaft and to the CV joint housing, preventing the boot from slipping off its seating bead under the centrifugal and articulation forces of normal driveshaft operation. That definition describes the function. It does not specify the band type, the band diameter, the band width, the band material, the installation tool required, whether the band is a rolled-edge crimp type, an ear-clamp type, a worm-gear clamp type, a low-profile stepless clamp, or a wide-body clamp designed for high-articulation applications, what the seating bead diameter on the boot neck or boot body is, or which CV joint and boot the band is designed to retain. A listing under PartTerminologyID 2280 that covers only the vehicle year, make, and model without specifying the band type, the installed diameter, and the width cannot be evaluated by any buyer who has measured the boot neck or boot body before ordering, and it cannot be evaluated by any buyer who needs to confirm they have the correct installation tool for the band type being ordered.
For sellers, the CV joint boot band is a component where the return pattern is driven almost entirely by two sourcing errors that a complete listing prevents. The first is a diameter mismatch: a band with an installed diameter that is too large cannot be tightened enough to seal the boot neck against the shaft, and a band that is too small cannot be installed over the boot bead without damaging the boot. The second is a band-type mismatch that produces an installation failure when the buyer does not have the tool required for the band type received. An ear-clamp type band requires a dedicated ear-clamp plier to deform the ear and lock the clamp. A rolled-edge crimp band requires a crimp tool with the correct jaw profile. A worm-gear clamp requires a screwdriver or a hex driver. A buyer who receives an ear-clamp band when they expected a worm-gear clamp either returns the band or attempts to deform the ear with pliers, producing an improperly seated clamp that fails to seal the boot and allows grease to escape and contamination to enter the CV joint.
For sellers, the listing under this PartTerminologyID is only useful if it specifies the band type, the installed diameter range, the band width, the band material, and the installation tool required. Without those five attributes, the listing cannot be verified before ordering and cannot prevent the two return drivers that dominate this PartTerminologyID.
What the CV Joint Boot Band Does
Sealing the boot at the shaft end and at the joint housing end
The CV joint boot is a bellows-shaped rubber or thermoplastic boot that covers the CV joint and retains the grease that lubricates the joint. The boot has a small-diameter neck at the inner end that clamps to the axle shaft, and a large-diameter body or neck at the outer end that clamps to the CV joint housing or the joint's outer race. A band at each end retains the boot against the seating bead molded into the shaft groove or the housing groove.
The inner band at the shaft end is smaller in diameter than the outer band at the joint housing end because the axle shaft diameter is smaller than the CV joint housing diameter. On most passenger vehicle CV joints, the two bands are different sizes and are not interchangeable even on the same boot. A listing that does not specify whether the band is for the inner shaft end or the outer housing end, or that does not distinguish the two by diameter, sends the buyer to an installation where one band fits and the other does not.
The forces the band must resist during operation
The boot and its retaining bands are subject to three forces during operation that can cause the boot to separate from its seating bead if the band is not correctly installed and correctly sized.
The first is centrifugal force. The axle shaft rotates at wheel speed, and the mass of the boot and the grease inside it generates a centrifugal force that tends to pull the boot outward from the shaft. At highway speeds, this centrifugal force is significant enough to partially lift the boot neck off the shaft if the inner band is not seated against the bead with sufficient clamping force.
The second is articulation force. When the wheel steers or the suspension travels, the CV joint articulates and the boot flexes. The flexing changes the pressure distribution inside the boot, and at the extremes of articulation, the boot neck can be pulled away from the shaft bead on one side while being compressed on the other. The band must maintain sealing contact around the full circumference of the boot neck throughout the articulation range.
The third is thermal cycling. The boot and the grease inside it heat up during operation and cool when the vehicle is parked. The grease expands when hot, increasing the pressure inside the boot, and contracts when cold, reducing the pressure. This thermal cycling creates a pressure differential at the boot neck that the band must resist to prevent grease from being pumped past the seal on every heat-cool cycle.
The consequence of a failed or missing boot band
A boot band that has failed or that was incorrectly installed allows the boot neck to lift off the seating bead. Grease escapes through the opening. Water, dirt, and road grit enter through the same opening. The CV joint runs on contaminated grease that rapidly loses its protective film, and the joint's ball bearings and race surfaces begin to wear. The first symptom of grease loss from a failed boot band is typically a clicking noise during tight turns at low speed, which is the sound of a dry CV joint ball skipping rather than rolling smoothly in the race. By the time the clicking is audible, the joint has typically been running dry long enough that replacement of the entire CV joint is required rather than simply replacing the boot and band.
A boot band failure that is caught early, before the grease is fully expelled and before contamination has reached the joint, can be repaired by cleaning the boot and shaft, applying fresh grease, repositioning the boot, and installing a new band. This is the lowest-cost repair in the CV joint service category, and the band listing is the entry point for buyers attempting this repair before the joint fails.
The Band Types Under PartTerminologyID 2280
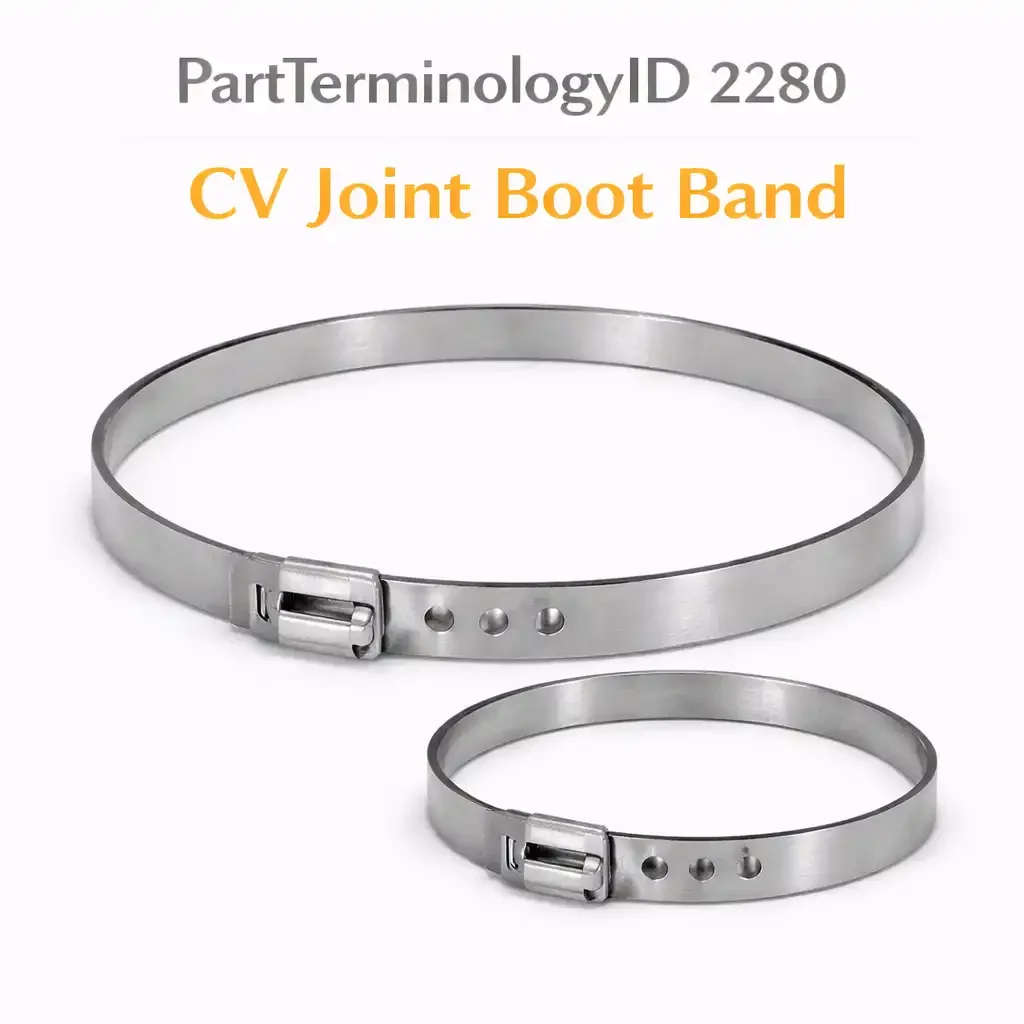
Rolled-edge crimp band
The most common OE band type. A flat stainless steel strip formed into a circle with the edges rolled under to eliminate sharp edges that would cut the boot. The band is installed by placing it around the boot neck, aligning it in the seating groove, and using a CV boot crimp tool to compress the band's locking tab onto the band body, which reduces the band's circumference and clamps it against the boot neck.
The rolled-edge crimp band requires a dedicated crimp tool. The crimp tool has a jaw that engages the locking tab and deforms it over the band body. An improperly deformed tab produced by the wrong tool or by improvised tools produces a band that appears seated but does not maintain clamping force through the full range of boot articulation. The listing must specify that a CV boot crimp tool is required and describe the locking tab mechanism so the buyer can verify they have the correct tool before ordering.
Ear clamp band
A formed stainless steel band with one or two raised ears at the closure point. The ears are deformed by a dedicated ear-clamp plier that squeezes the ear flat, which reduces the band's circumference and locks it in the clamped position. Two-ear clamps provide more evenly distributed clamping force than single-ear designs and are preferred for larger-diameter boot body clamps.
The ear clamp is common on aftermarket replacement boot kits and on many European OE applications. The ear-clamp plier is a different tool from the crimp tool used for rolled-edge bands. The listing must specify ear clamp type and note that an ear-clamp plier is required for correct installation.
Worm-gear clamp
A stainless steel band with a worm-gear mechanism that tightens by rotating a hex head screw. The worm-gear clamp does not require a dedicated tool: a screwdriver or a hex driver is sufficient. It is the most accessible band type for DIY buyers but is not typically OE-specified for CV boot applications because the worm-gear mechanism's raised screw housing can contact the boot rubber during articulation and wear through the boot at that contact point over time.
On applications where the CV joint articulation range is limited and the worm-gear housing will not contact the boot during normal operation, the worm-gear clamp is an acceptable repair band. The listing must note the articulation range limitation and the risk of boot contact if used on high-articulation applications.
Low-profile stepless clamp
A flat-profile stainless steel band with no raised ear or housing. The stepless clamp is closed by a special tensioning tool that pulls the band tight and simultaneously cuts the excess band at the correct tension. This design produces the lowest-profile clamp of any band type and is least likely to contact the boot during articulation. It is common on OE applications for high-articulation inner CV joints.
The stepless clamp requires a dedicated tensioning and cutting tool. Without the tool, the clamp cannot be installed correctly. The listing must specify the tool requirement because this is the band type most likely to produce a return from a buyer who does not own the tool and discovers the requirement only after ordering.
Wide-body clamp for high-articulation applications
A wider version of any of the above band types, used at the inner CV joint position on front-wheel-drive vehicles where the joint articulation angle is higher than at the outer joint. The wider band distributes the clamping force over a larger area of the boot neck, which reduces the unit pressure at any point on the boot bead and prevents the boot from being cut by a narrow band under high-articulation compression.
The Specifications That Determine Correct Band Fitment
Band type
The band type determines the installation tool, the clamping mechanism, and the profile above the boot surface. All four of those attributes are relevant to the buyer's decision before ordering. The band type must be the first specification in the listing.
Installed diameter range
The most critical dimensional specification. The installed diameter is the inner diameter of the band when it is fully clamped on the boot neck or body. This must match the outer diameter of the boot neck or body at the seating bead. A band with an installed diameter range of 50 to 55mm will clamp correctly on a boot neck with a seating bead diameter between 50 and 55mm. A boot neck with a 57mm seating bead will not be adequately clamped by this band because the band cannot tighten sufficiently to close the 2mm gap.
The installed diameter is not the same as the band's relaxed diameter before installation. Listings that state only the relaxed band diameter cannot be verified against the boot neck measurement. The listing must state the installed diameter range.
Band width
The band width determines the contact area between the band and the boot neck. A wider band distributes the clamping force over more of the boot neck seating bead, which reduces the unit pressure at any point and reduces the risk of cutting the boot under the band during articulation. The minimum acceptable band width for any CV boot application is 14mm. Bands narrower than 14mm concentrate clamping force on too small an area of the boot neck and may cut through the boot rubber under sustained articulation.
Band material
Stainless steel is the standard material for all CV boot band types. Carbon steel bands are subject to corrosion in the road spray environment and may corrode at the locking mechanism before the boot requires replacement, requiring a band replacement before the boot's natural service end. The listing must specify stainless steel for any band intended for long-term service.
Position: inner shaft band or outer housing band
The inner and outer bands on the same boot are different diameters. The listing must specify which position the band covers.
Why This Part Generates Returns
Buyers order the wrong CV joint boot band because:
the band type is not specified and the buyer does not have the installation tool required for the received band type
the installed diameter is not stated and the band cannot be tightened sufficiently to clamp the boot neck, or cannot be installed over the seating bead
the position is not specified and the buyer receives an outer housing band when they need the smaller-diameter inner shaft band
the band width is not stated and the replacement is narrower than OE, concentrating clamping force and cutting the boot under articulation
the material is carbon steel rather than stainless and the buyer expected stainless construction
a universal band kit is listed without stating that it contains bands for both positions, leading the buyer to order two kits when one covers both ends
Status in New Databases
PIES/PCdb: PartTerminologyID 2280, CV Joint Boot Band
PIES 8.0 / PCdb 2.0: No change
Top Return Scenarios
Scenario 1: "Ear clamp received, no ear-clamp plier available, cannot install"
The listing did not specify the band type. The buyer expected a worm-gear clamp they could install with a screwdriver. They received an ear-clamp band. Without the ear-clamp plier, the ear cannot be correctly deformed and the band cannot be seated. The buyer returns the band rather than purchasing the tool.
Prevention language: "Band type: [ear clamp]. Installation tool required: ear-clamp plier (CV boot clamp plier). Ear-clamp bands cannot be correctly installed without a dedicated ear-clamp plier. A plier that squeezes the ear flat without the correct jaw geometry will produce an improperly seated clamp. Verify you have an ear-clamp plier before ordering this band type."
Scenario 2: "Band installed diameter too small, cannot fit over boot seating bead"
The listing stated the band fits the application by vehicle year, make, and model. The boot seating bead outer diameter at the housing end is 82mm. The band's maximum installed diameter is 76mm. The band cannot be expanded over the 82mm bead for installation.
Prevention language: "Installed diameter range: [X]mm to [X]mm. Measure the outer diameter of your boot seating bead before ordering. The band's installed diameter range must include your boot bead outer diameter. A band with a maximum installed diameter smaller than the boot bead cannot be installed without damaging the boot."
Scenario 3: "Outer housing band received, needed inner shaft band, diameters are different"
The listing specified CV joint boot band with the vehicle fitment but did not distinguish inner from outer. The buyer needed the inner shaft band, which has a smaller installed diameter. They received the outer housing band. The inner shaft boot neck diameter is 32mm. The outer housing band minimum installed diameter is 52mm. The band cannot be tightened onto the 32mm shaft neck.
Prevention language: "Band position: [inner axle shaft / outer CV joint housing]. Inner shaft band installed diameter: [X]mm to [X]mm. Outer housing band installed diameter: [X]mm to [X]mm. The inner and outer bands for this application are different diameters. Specify the position when ordering. If both positions require new bands, a two-band kit covers both ends."
Scenario 4: "Narrow band cut through boot rubber within 6 months"
The replacement band is 10mm wide. The OE band is 18mm wide. The narrower band concentrates the clamping force over a smaller area of the boot neck. At the inner CV joint's full articulation angle, the boot rubber is compressed under the narrow band edge and the band cuts through the boot within 6 months of installation.
Prevention language: "Band width: [X]mm. The OE band width for this application is [X]mm. Do not substitute a narrower band at inner CV joint positions where the articulation angle exceeds 20 degrees. Narrower bands concentrate clamping force and may cut through the boot rubber under sustained high-articulation operation."
Scenario 5: "Stepless clamp received, tensioning tool not available, clamp installed incorrectly with pliers"
The listing did not specify the band type or the tool requirement. The buyer received a stepless clamp and attempted to install it by pulling the band tight with pliers and bending the excess band over the body. The clamp was not tensioned to the correct force and the excess band was not cut flush. The boot leaked grease at the improperly seated clamp within 3,000 miles.
Prevention language: "Band type: [stepless clamp]. Installation tool required: CV boot band tensioning and cutting tool. Stepless clamps cannot be correctly installed without the dedicated tensioning tool, which pulls the band to the correct tension and cuts the excess simultaneously. Installing a stepless clamp without the tensioning tool will produce insufficient or uneven clamping force and the boot will leak grease."
What to Include in the Listing
Core essentials
PartTerminologyID: 2280
component: CV Joint Boot Band
band type: rolled-edge crimp, ear clamp, worm-gear, low-profile stepless, or wide-body (mandatory)
band position: inner axle shaft or outer CV joint housing (mandatory)
installed diameter range in mm (mandatory)
band width in mm (mandatory)
band material: stainless steel or carbon steel (mandatory)
installation tool required: specify the tool type and whether it is commonly available (mandatory)
quantity: 1 band or 2-band kit covering both positions
Fitment essentials
year/make/model/submodel
axle position: front left, front right, rear left, rear right
inner or outer CV joint when the vehicle has different boot specifications at each joint
Dimensional essentials
installed diameter range in mm: minimum and maximum
band width in mm
band thickness in mm for clearance verification
locking tab or ear dimensions for tool selection verification
Image essentials
band in isolation showing the band type, locking mechanism, and width
installed context showing the band correctly seated on the boot neck with the locking mechanism visible
tool shown alongside the band to illustrate the required installation tool
comparison image showing inner shaft band and outer housing band side by side to illustrate the diameter difference
close-up of the locking mechanism before and after correct installation
Catalog Checklist for ACES/PIES Teams
PartTerminologyID = 2280
require band type as first attribute: rolled-edge crimp, ear clamp, worm-gear, stepless, or wide-body (mandatory)
require band position: inner shaft or outer housing (mandatory)
require installed diameter range in mm: minimum and maximum (mandatory)
require band width in mm (mandatory)
require band material: stainless or carbon steel (mandatory)
require installation tool specification (mandatory)
differentiate from CV joint boot kit (PartTerminologyID varies): the boot kit includes the boot, the grease, and the bands as a set; the band alone is listed under 2280 for applications where only the band requires replacement; do not duplicate complete kit listings under this PartTerminologyID
differentiate from CV joint (PartTerminologyID varies): the CV joint is the articulating mechanism the boot covers; the band retains the boot on the joint; a failed band that allowed grease loss and contamination may require CV joint replacement, not just band replacement
flag installed diameter as primary dimensional attribute: the relaxed band diameter before installation is not the same as the installed diameter and is not the specification buyers need for fitment verification; require installed diameter range explicitly
flag band type tool requirement as mandatory: the installation tool requirement determines whether the buyer can complete the installation; a listing that omits the tool requirement sends buyers to an installation they cannot complete without returning the part or improvising an installation that fails to seal
flag inner versus outer position distinction: the two bands on the same boot are different diameters; a listing that does not distinguish position cannot be verified against the boot neck measurement
FAQ (Buyer Language)
How do I measure the boot neck to find the correct band diameter?
With the old band removed and the boot neck seated on the shaft groove or housing groove, measure the outer diameter of the boot neck at the seating bead with a caliper. This is the diameter the band must clamp. Select a band whose installed diameter range includes this measurement. If the boot has already been removed from the shaft for inspection, seat the boot neck over the shaft groove before measuring, because the boot neck diameter when off the shaft may be slightly smaller than when expanded over the shaft bead.
My boot is still intact but grease is visible around the band. Can I just replace the band?
Yes, if the boot itself is not cracked, torn, or perforated. Clean the grease from the boot neck and the shaft groove. Remove the failed band. Inspect the boot neck seating bead for cuts or deformation from the old band. If the bead is undamaged, wipe the boot neck and shaft groove clean, apply a small amount of fresh grease compatible with the CV joint specification, reposition the boot on the shaft groove, and install a new band. If the boot neck bead has been cut by a too-narrow band or deformed by an incorrectly installed clamp, the boot must be replaced as well.
What is the difference between an ear-clamp plier and a regular pair of pliers for installing ear clamps?
An ear-clamp plier has a jaw profile that engages the sides of the clamp ear and squeezes it straight down, deforming the ear evenly across its full width. A regular pair of pliers applies uneven force at the point contact of the jaw tips, which deforms one side of the ear more than the other, producing a twisted ear that does not close flush against the band body. An improperly deformed ear leaves a gap between the ear and the band body that allows the clamp to spring back slightly when the plier is removed, reducing the clamping force below the level needed to seal the boot neck through the full articulation range.
Can I use a worm-gear hose clamp instead of the OE-type band if I do not have the crimp or ear tool?
On outer CV joint positions with limited articulation range, a worm-gear clamp is an acceptable temporary repair that allows the vehicle to be driven while the correct tool and band are sourced. On inner CV joint positions with high articulation angles, do not use a worm-gear clamp as a permanent repair. The worm-gear housing protrudes above the band surface and will contact the boot during full articulation, wearing through the boot at the contact point. If a worm-gear clamp is used as a temporary measure, replace it with the correct band type as soon as the correct tool is available.
How do I know if the CV joint is still serviceable after a boot band failure?
Clean the shaft and joint housing of all expelled grease and contamination before inspecting the joint. With the boot removed and the joint cleaned, check for roughness or play in the joint by grasping the shaft and housing and rocking them relative to each other in all directions. A serviceable joint will have no perceptible play and will articulate smoothly without roughness or gritty resistance. If the joint has roughness, play, or a clicking noise when rotated while articulated, the grease loss and contamination from the failed band have damaged the joint and the joint requires replacement. If the joint passes the inspection, pack it with fresh grease of the correct type and volume, install a new boot, and install new bands.
Cross-Sell Logic
CV Joint Boot Kit (PartTerminologyID varies: if the boot is cracked, torn, or has a damaged seating bead from a failed band, the complete boot kit including the boot, grease, and both bands is required rather than the band alone)
CV Joint (PartTerminologyID varies: if the boot band failure allowed grease loss and contamination that damaged the joint, the CV joint must be replaced; the band listing is the entry point for buyers catching the failure early, and the CV joint listing is the escalation for buyers whose joint is already damaged)
CV Joint Grease (when a band is replaced and the boot is repositioned, the grease level in the boot should be checked and fresh grease of the correct type added if any was lost through the failed band)
Axle Shaft (if the shaft groove that the boot inner band seats in is corroded or worn, the groove may not retain the new band correctly; inspect the shaft groove before installing the replacement band)
CV Boot Band Installation Tool (the installation tool is the most predictable concurrent purchase for any ear-clamp or stepless clamp band listing; buyers who do not own the tool will need it to complete the installation)
Frame as "the band seals the boot. The boot retains the grease. The grease lubricates the joint. The joint articulates the halfshaft. If the band fails and the grease escapes, the joint follows. A band replaced early costs a fraction of the joint replacement that follows a band left to fail."
Final Take for PartTerminologyID 2280
CV Joint Boot Band (PartTerminologyID 2280) is one of the lowest-cost components in the drivetrain category and one of the highest-return-rate components relative to its price because the two attributes that determine whether the buyer can install it, the band type and the installed diameter, are the two attributes most consistently absent from listings under this PartTerminologyID.
The band type is the first attribute because it determines whether the buyer owns the tool needed for installation. A buyer who does not have the tool cannot install the band regardless of how correctly the diameter and width match. The installed diameter range is the second attribute because it is the only dimensional specification that allows the buyer to verify fitment against the boot neck measurement before ordering. The width is the third because a band that is narrower than OE will cut the boot at high articulation angles and produce a premature boot failure that looks identical to the original band failure the repair was meant to address.
State the band type. State the installed diameter range. State the band width. State the material. State the installation tool requirement. State the position. That is the same listing strategy as every other PartTerminologyID in this series: the generic PartTerminologyID requires specific attributes at every level to become a listing buyers can act on without guessing. For PartTerminologyID 2280, guessing on the band type sends the buyer to an installation they cannot complete, and guessing on the diameter sends a band that cannot clamp the boot neck it was purchased to seal.