Voltmeter Gauge (PartTerminologyID 1496): The Gauge That Replaced the Ammeter Because It Does the Same Job Without Setting Your Dashboard on Fire
Written by Arthur Simitian | PartsAdvisory
The Ammeter Gauge post (PartTerminologyID 1452) told the story of why manufacturers eliminated the ammeter from production vehicles: routing 60 to 100+ amps of charging current through wires behind the dashboard created a fire risk when connections corroded or loosened. The voltmeter is what replaced it.
A voltmeter measures the electrical system voltage rather than the current flow. It tells the driver whether the charging system is working correctly by showing the battery and system voltage. The critical difference is that a voltmeter carries only a tiny signal current through the dashboard wiring, not the full charging current. The fire risk is eliminated.
The information is slightly different but equally useful. An ammeter shows whether current is flowing into or out of the battery (charging versus discharging). A voltmeter shows the result of that charging: the system voltage. If the alternator is charging correctly, the voltage reads 13.5 to 14.5 volts with the engine running. If the alternator fails, the voltage drops toward battery resting voltage (12.4 to 12.6 volts) and continues dropping as the battery drains. If the voltage regulator fails and overcharges, the voltage climbs above 15 volts, which damages the battery and can burn out electronics.
The voltmeter became the standard charging system gauge on production vehicles from the early 1980s onward. Many vehicles replaced the voltmeter with a simple battery warning light by the 1990s. Today, most vehicles have neither a voltmeter nor an ammeter on the dashboard, just a warning light that illuminates when the charging system fails. The voltmeter as a dashboard gauge exists primarily in the classic car restoration market (on vehicles that originally had one), the ammeter-to-voltmeter conversion market (replacing an ammeter with a safer voltmeter), and the aftermarket performance market.
This post is built for aftermarket catalog teams, marketplace sellers, and buyers who want fewer mistakes and fewer returns.
Status in New Databases
Status in New Databases
Current: PIES 7.2 + PCdb Future: PIES 8.0 + PCdb 2.0 Status: No change
What Voltmeter Gauge Means in the Aftermarket
Voltmeter Gauge (PartTerminologyID 1496) refers to a dashboard instrument that displays the electrical system voltage.
In catalog reality, this covers:
OEM replacement voltmeter. A gauge designed to replace the factory voltmeter in a specific vehicle's instrument cluster. Must match diameter, face style, graphics, needle color, illumination, and voltage range. Common on 1980s and 1990s trucks and cars that included a factory voltmeter.
Ammeter-to-voltmeter conversion gauge. A voltmeter designed to fit the same cluster opening as the factory ammeter it replaces. Available for popular classic car applications. The conversion eliminates the high-current wiring through the dashboard. The buyer disconnects the ammeter wiring (the heavy gauge wires that carried full charging current) and connects two small signal wires to the voltmeter. This is the safety upgrade discussed in the Ammeter post (1452).
Universal/aftermarket voltmeter. A standalone gauge in standard diameters (2-1/16 inch, 2-5/8 inch) for custom builds, hot rods, and performance vehicles. Simple installation: connect to switched 12V power, ground, and illumination. No sender required because the gauge reads the system voltage directly.
Digital voltmeter. An electronic display showing voltage numerically. Available as standalone gauges, cigarette lighter plug-in displays, or integrated into multi-function displays.
Voltmeter as part of an instrument cluster. On vehicles where the voltmeter was a factory instrument, it may be integrated into the cluster and not separately replaceable on modern vehicles.
What this part does NOT cover
Ammeter gauge (PartTerminologyID 1452). Measures current, not voltage. The voltmeter replaced it.
Battery warning light. A simple on/off indicator, not a gauge.
Multimeter (diagnostic tool). A handheld device that measures voltage, current, and resistance. A diagnostic tool, not a dashboard instrument.
Battery monitor / battery management system. Electronic systems that monitor battery state of charge, health, and temperature. More complex than a simple voltage display.
Why the Voltmeter Is the Simplest Gauge to Install
Unlike every other gauge covered in this series, the voltmeter does not require a sender. The fuel level gauge needs a sender in the tank. The oil pressure gauge needs a sender in the engine block. The oil temperature gauge needs a sender in the oil system. The transmission temperature gauge needs a sender in the ATF circuit. The voltmeter needs nothing except a connection to the vehicle's electrical system.
The gauge reads the voltage directly at its power terminals. Connect switched 12V power (a circuit that is energized when the ignition is on), connect ground, and connect illumination. The gauge reads the system voltage through its own power connection. No sender, no adapter, no special wiring, no impedance matching. This makes the voltmeter the easiest gauge to install and the one with the fewest fitment compatibility issues.
What the Voltmeter Tells You
Including this interpretive guide in listing descriptions helps buyers understand what they are looking at:
Engine off, key on: 12.4 to 12.6 volts. Normal resting battery voltage for a fully charged 12V lead-acid battery. Below 12.2 volts indicates a partially discharged battery. Below 12.0 volts indicates a significantly discharged battery.
Engine running, no load: 13.5 to 14.5 volts. The alternator is charging correctly. The voltage should be higher than resting battery voltage because the alternator is pushing current into the battery and powering the electrical system.
Engine running, heavy electrical load (headlights, blower, heated seats, etc.): 13.0 to 14.0 volts. Slight voltage drop under heavy load is normal as long as it stays above 13.0 volts.
Engine running, below 13.0 volts: The alternator is not keeping up with electrical demand. Possible failing alternator, loose belt, bad voltage regulator, or corroded connections.
Engine running, above 15.0 volts: The voltage regulator is failing and overcharging. This will boil the battery electrolyte, damage the battery, and can burn out sensitive electronics (modules, LED lighting, infotainment). Immediate attention required.
Voltage drops to battery resting level while driving: The alternator has stopped charging entirely. The vehicle is running on battery alone and will eventually stall when the battery is depleted.
Why This Category Creates Fitment Problems
Gauge diameter
Same issue as every other gauge in the series. The gauge must fit the cluster opening or gauge pod. Standard sizes: 2-1/16 inch and 2-5/8 inch for aftermarket. OEM varies.
Voltage range on the face
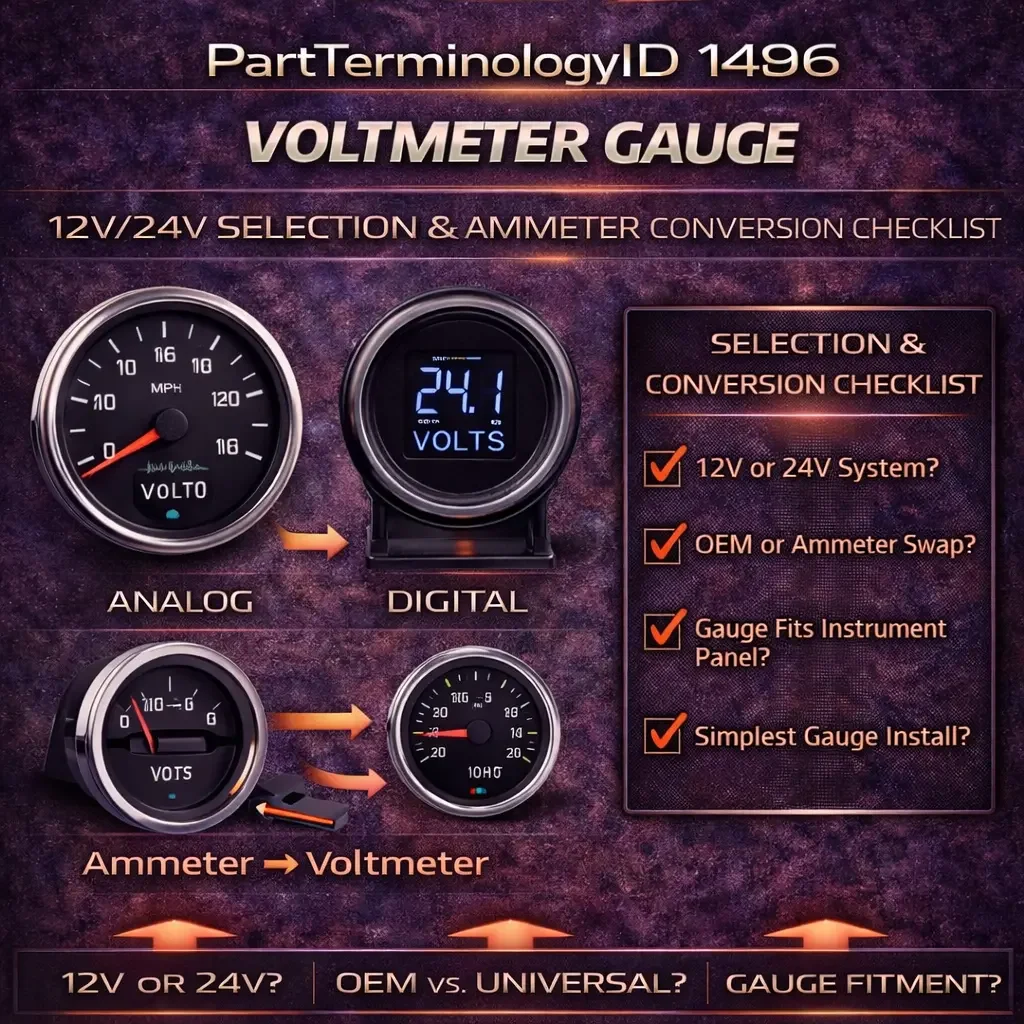
Most automotive voltmeters read 8 to 18 volts or 10 to 16 volts. The range must be appropriate for a 12V automotive system. A gauge designed for a 24V system (common on heavy equipment and military vehicles) reads 16 to 32 volts and is useless on a 12V vehicle. A 12V gauge on a 24V system will peg the needle and may be damaged.
12V versus 24V systems
Most passenger vehicles are 12V. Most heavy-duty commercial trucks, military vehicles, and some marine applications are 24V. The gauge must match the system voltage.
Face style for restoration
For OEM replacement and ammeter-to-voltmeter conversion, the face style must match the original cluster appearance. Conversion gauges that perfectly replicate the original ammeter's face style (same font, same color, same bezel) but read in volts instead of amps are the highest-value product in this category because they provide a safety upgrade that is invisible to anyone looking at the cluster.
Ammeter conversion wiring
When converting from an ammeter to a voltmeter, the buyer must disconnect the heavy-gauge ammeter wiring (which carried full charging current through the dashboard) and bypass it with a direct connection from the alternator to the battery at the junction block. The voltmeter is then connected with small-gauge signal wires. The listing for a conversion gauge should note: "Ammeter wiring must be bypassed during conversion. The heavy gauge wires that previously ran through the dashboard to the ammeter must be connected directly at the junction block. See included installation instructions."
Top Return Causes
1) Wrong gauge diameter
Prevention: Diameter in the title: "2-1/16 Inch Voltmeter" or "2-5/8 Inch Voltmeter."
2) 24V gauge ordered for 12V vehicle (or vice versa)
Prevention: System voltage in the title: "12V System Voltmeter (8-18V Scale)" or "24V System Voltmeter (16-32V Scale)."
3) Ammeter conversion gauge does not match the original cluster face style
Buyer wants a conversion that looks original but receives a universal gauge that does not match the font, color, or bezel of their cluster.
Prevention: For conversion gauges, specify the exact vehicle application and include a photo showing the gauge in the cluster alongside the other original gauges. "Ammeter-to-Voltmeter Conversion for 1967-1972 Chevy Truck. Matches factory gauge face style."
4) Buyer does not understand ammeter bypass wiring for conversion
Buyer installs the voltmeter but does not bypass the ammeter wiring. The heavy-gauge wires are still routed through the dashboard, connected to nothing or connected incorrectly.
Prevention: Include wiring bypass instructions with every conversion gauge. Note prominently: "IMPORTANT: The original ammeter wiring must be bypassed at the junction block during this conversion. Failure to bypass the ammeter wiring leaves unused high-current wires in the dashboard. See included instructions."
5) Buyer expects a sender is needed
Buyer searches for a "voltmeter sender" that does not exist because the voltmeter reads voltage directly at its terminals.
Prevention: Note in the listing: "No sender required. The voltmeter reads system voltage directly through its power connection. Connect to switched 12V power and ground."
Compatibility Checklist for Buyers
1) Confirm system voltage. 12V (most passenger vehicles) or 24V (heavy equipment, military, some marine).
2) Confirm gauge diameter. 2-1/16 inch, 2-5/8 inch, or OEM-specific.
3) If converting from an ammeter, confirm the conversion gauge matches your cluster face style.
4) If converting from an ammeter, plan for wiring bypass. The heavy ammeter wires must be rerouted at the junction block.
5) No sender required. Do not order a sender for a voltmeter installation.
Catalog Checklist for Attributes
Core taxonomy: Product form (OEM replacement, ammeter-to-voltmeter conversion, universal aftermarket, digital). Separate from Ammeter Gauge, Battery Warning Light, Multimeter, and Battery Monitor.
Specs: Voltage range (8-18V for 12V systems, 16-32V for 24V systems). System voltage: 12V or 24V.
Physical specs: Gauge diameter. Face style, bezel finish, needle color, illumination type and color.
Conversion-specific: Original ammeter application (year, make, model). Wiring bypass instructions included (yes/no). Matches original cluster face style (yes/no).
Images: Gauge face, rear showing terminals (note: only power, ground, and illumination, no sender), conversion gauge shown alongside original cluster gauges for style match, and wiring diagram for ammeter bypass.
FAQ
What voltage should I see with the engine running?
13.5 to 14.5 volts indicates normal alternator charging. Below 13.0 volts indicates a charging problem. Above 15.0 volts indicates an overcharging condition that can damage the battery and electronics.
Do I need a sender for a voltmeter?
No. The voltmeter reads system voltage directly through its power connection. No sender, no adapter, no special wiring. This is the simplest gauge to install.
Should I replace my ammeter with a voltmeter?
If your vehicle has a factory ammeter, converting to a voltmeter eliminates the fire risk from high-current wiring through the dashboard. The voltmeter provides equally useful charging system information. Conversion gauges that match the original face style preserve the stock appearance.
Final Take for Aftermarket Teams
Voltmeter Gauge (PartTerminologyID 1496) is the safest, simplest, and most install-friendly gauge in the entire series. No sender. No impedance matching. No pressure lines. No capillary tubes. Just three wires: power, ground, and illumination. The catalog challenges are limited to gauge diameter, system voltage (12V versus 24V), and face style matching for OEM replacement and ammeter conversion applications. The ammeter-to-voltmeter conversion market is the highest-value segment because it combines a safety upgrade with a restoration-quality appearance. The teams that catalog this well cross-reference every ammeter listing with a voltmeter conversion alternative, include the wiring bypass instructions, and show the conversion gauge in the original cluster to demonstrate the style match.