Ammeter Gauge (PartTerminologyID 1452): The Classic Car Gauge That Modern Vehicles Eliminated for Good Reason
Written by Arthur Simitian | PartsAdvisory
The ammeter gauge measures the electrical current flowing into or out of the vehicle's battery. When the alternator is charging the battery, the ammeter needle swings to the positive (charge) side. When the battery is discharging (powering accessories with the engine off, or when the electrical load exceeds the alternator output), the needle swings to the negative (discharge) side. It tells the driver whether the charging system is keeping up with the electrical demand.
No modern vehicle has an ammeter gauge. They were eliminated from production vehicles by the early 1980s on most platforms, replaced by a simpler voltmeter or a basic battery/charging warning light. The reason was safety: the ammeter requires the full charging current of the alternator to pass through wires running from the engine bay, through the firewall, to the gauge on the dashboard, and back to the battery. On vehicles with high-output alternators, this means 60 to 100+ amps flowing through relatively thin gauge wires routed through the interior of the vehicle. If those wires or the connections at the gauge corrode, loosen, or develop resistance, the result is heat. Enough heat causes melting, smoke, and dashboard fires.
Dashboard fires caused by ammeter gauge wiring were a known failure mode on classic cars and trucks. It was one of the reasons manufacturers switched to voltmeters (which carry only a tiny signal current, not the full charging current) and warning lights (which require no current measurement at all). The ammeter gauge is a legacy technology that modern vehicle design intentionally removed.
But it remains a real catalog category because every classic car and truck built with an ammeter gauge still needs one when the original fails, and the restoration market demands correct, period-appropriate gauges.
This post is built for aftermarket catalog teams, marketplace sellers, and buyers who want fewer mistakes and fewer returns.
Status in New Databases
Status in New Databases
Current: PIES 7.2 + PCdb Future: PIES 8.0 + PCdb 2.0 Status: No change
What Ammeter Gauge Means in the Aftermarket
Ammeter Gauge (PartTerminologyID 1452) refers to the dashboard-mounted instrument that displays the electrical current flowing through the vehicle's charging circuit.
In catalog reality, this covers:
OEM replacement ammeter gauge. A gauge designed to replace the original factory ammeter in a specific vehicle's instrument cluster. The gauge must match the original in diameter, bezel style, face graphics, needle color, illumination type, terminal configuration, and amperage range. This is the restoration market product.
Universal/aftermarket ammeter gauge. A standalone gauge not tied to a specific vehicle. Available in standard diameters (2-1/16 inch and 2-5/8 inch are the most common) with various face styles, bezels, and amperage ranges. Used for custom builds, hot rods, and vehicles where the original gauge is unavailable or where the buyer is upgrading the gauge style.
Ammeter gauge as part of a gauge cluster. Some aftermarket gauge sets (commonly sold for classic cars and hot rods) include an ammeter along with a speedometer, tachometer, oil pressure, water temperature, and fuel level gauge. The ammeter is one component of the set and may not be available separately.
What this part does NOT cover
Voltmeter gauge. Measures battery voltage rather than current flow. Different instrument, different PartTerminologyID. The voltmeter replaced the ammeter on most vehicles in the late 1970s and 1980s.
Battery warning light / charging system indicator. The dashboard warning light that illuminates when the charging system is not functioning. Not a gauge.
Alternator. The component that generates charging current. Different system, different PartTerminologyID.
Shunt-type ammeter. Some high-performance and racing applications use a shunt (a precision resistor in the charging wire) with a voltmeter-type gauge that reads the voltage drop across the shunt to calculate current. This is electrically different from a traditional ammeter but serves the same informational purpose.
Why This Category Creates Fitment Problems
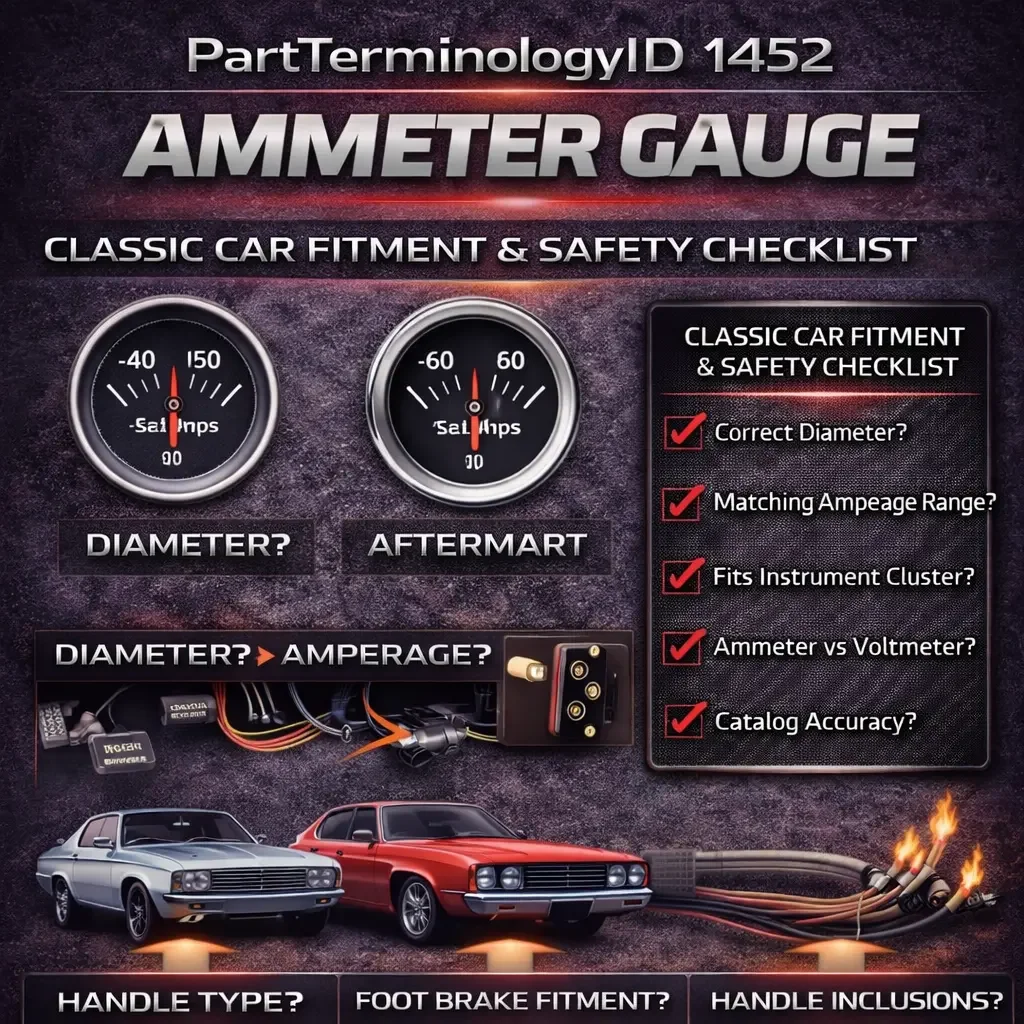
Gauge diameter
Instrument cluster openings are specific diameters. The gauge must physically fit the hole. Common diameters include 2 inches, 2-1/16 inches, and 2-5/8 inches. A gauge that is 1/16 inch too large will not fit. OEM replacement gauges are made to the original diameter. Universal gauges must be matched to the cluster opening size.
Amperage range
Ammeter gauges are available in different amperage ranges: 30-0-30, 60-0-60, and 100-0-100 are common. The range must match the vehicle's charging system output. A 30-0-30 gauge on a vehicle with an 80-amp alternator will peg the needle during normal charging. A 100-0-100 gauge on a vehicle with a 35-amp alternator will barely move the needle, making it difficult to read.
Face style and graphics
For restoration buyers, the gauge face must match the original. This means the correct font, the correct number positions, the correct color scheme (white on black, green on black, etc.), the correct needle color, and the correct manufacturer logo or markings. A gauge with the correct amperage range but the wrong face style is not acceptable for a period-correct restoration.
Illumination type
Classic car gauges are illuminated by incandescent bulbs behind the gauge face. The bulb type, socket size, and illumination color (white, green, blue, red) vary by manufacturer and model year. Some aftermarket gauges use LED illumination, which provides a different light quality than the original incandescent. For restoration purists, the illumination must match the original.
Terminal configuration
The ammeter gauge has terminals on the back that the charging wires connect to. The terminal type (stud, blade, screw), terminal position (top, bottom, side), and the number of terminals vary. The replacement gauge must match the vehicle's wiring configuration or require adapter wiring.
Polarity
The gauge must be wired so that the needle swings in the correct direction: positive (right) when charging, negative (left) when discharging. Reversing the connections reverses the needle direction. This is an installation issue rather than a fitment issue, but it generates confusion and calls.
The Voltmeter Conversion Discussion
Many classic car owners and restorers face a decision: replace the ammeter with an identical ammeter, or convert to a voltmeter?
Arguments for keeping the ammeter. Period correctness. Show car judging may deduct points for non-original gauges. The ammeter provides different information than a voltmeter (current flow versus voltage level), and some drivers prefer the ammeter's real-time charging feedback.
Arguments for converting to a voltmeter. Safety. The ammeter routes the full charging current through the dashboard. A voltmeter carries only a signal wire (negligible current). The voltmeter eliminates the fire risk entirely. A voltmeter also provides useful information: it shows whether the system voltage is in the correct range (13.5V to 14.5V charging, 12.4V to 12.6V resting). Voltmeter conversion kits are available that fit the original ammeter opening and match the original gauge face style.
This is a relevant catalog and content opportunity. Sellers who stock ammeters should also stock voltmeter conversion kits for the same applications and cross-reference between them.
Top Return Causes
1) Wrong gauge diameter
Gauge does not fit the instrument cluster opening.
Prevention: Specify diameter in the title and specs: "2-1/16 Inch Ammeter Gauge" or "2-5/8 Inch Ammeter Gauge." For OEM replacements, cross-reference to the specific vehicle cluster.
2) Wrong amperage range
Gauge range does not match the vehicle's charging system.
Prevention: Specify amperage range in the title: "60-0-60 Amp Ammeter Gauge." Note: "For vehicles with 40 to 60 amp alternators."
3) Wrong face style for restoration application
Gauge is functionally correct but the face graphics do not match the original.
Prevention: For OEM replacement gauges, specify the vehicle application and include a photo of the gauge face. Note whether the face matches the original factory design.
4) Universal gauge ordered expecting OEM replacement
Buyer needs an exact factory replacement and orders a universal aftermarket gauge that does not match the original in appearance or terminal configuration.
Prevention: Clear product form in the title: "OEM Replacement Ammeter Gauge for 1967-1972 Chevy Truck" versus "Universal 2-1/16 Inch Ammeter Gauge."
5) Buyer actually needs a voltmeter
The buyer's vehicle originally had an ammeter but has been previously converted to a voltmeter, or the buyer wants to convert but orders an ammeter out of habit.
Prevention: Cross-reference to voltmeter conversion kits in the listing: "Looking for a safer alternative? See our Voltmeter Conversion Kit for the same application."
Compatibility Checklist for Buyers
1) Confirm your vehicle has an ammeter, not a voltmeter or warning light. Check the instrument cluster. An ammeter has a needle that swings between positive and negative markings. A voltmeter reads in volts (typically 8 to 18V). A warning light is a simple indicator.
2) Measure the gauge diameter. Measure the opening in the cluster where the gauge mounts. Match to the replacement gauge diameter.
3) Confirm the amperage range. Match to your vehicle's alternator output. A 60-0-60 gauge is appropriate for most classic cars with 40 to 60 amp alternators. A 100-0-100 gauge is appropriate for vehicles with higher-output alternators.
4) Determine whether you need an OEM replacement or a universal gauge. For a period-correct restoration, you need an OEM-style gauge with the correct face graphics. For a custom build or driver-quality car, a universal gauge may be acceptable.
5) Consider the voltmeter conversion. If safety is a priority, a voltmeter conversion kit eliminates the full-current wiring through the dashboard and provides equally useful charging system information.
Catalog Checklist for Attributes
Core taxonomy: Product form (OEM replacement, universal/aftermarket, gauge cluster component, voltmeter conversion kit). Separate from Voltmeter Gauge, Battery Warning Light, Alternator, and other instrument cluster gauges.
Fitment: For OEM replacements: year, make, model, submodel, instrument cluster option. For universal: gauge diameter and amperage range. OEM part number cross-reference.
Physical specs: Gauge diameter (exact, to 1/16 inch). Amperage range. Face style description. Needle color. Illumination type (incandescent, LED). Terminal type, count, and position. Mounting depth (how far the gauge extends behind the cluster panel).
Package contents: Gauge, mounting hardware, wiring instructions, bulb (if included).
Images: Gauge face (front view showing graphics, needle, and bezel), back view showing terminals and mounting depth, side view showing overall depth, and for OEM replacements, a reference photo of the original gauge in the cluster.
FAQ
Why did manufacturers stop using ammeter gauges?
Safety. The ammeter requires the full alternator charging current (60 to 100+ amps) to flow through wires routed from the engine bay through the firewall to the dashboard gauge and back. Corroded or loose connections in this circuit generate heat that can cause dashboard fires. Voltmeters and warning lights carry only signal-level current and eliminated this risk.
Should I replace my ammeter with a voltmeter?
If the vehicle is a daily driver and safety is a priority, yes. A voltmeter conversion kit fits the original ammeter opening and provides useful charging system information without routing high-current wires through the dashboard. If the vehicle is a show car being restored to original specifications, keeping the ammeter maintains period correctness.
My ammeter needle stays in the center. Is the gauge bad?
Not necessarily. A centered needle means the charging system is balanced: the alternator is producing exactly the current the electrical system is consuming. This is normal at steady cruising speed with minimal accessories running. If the needle never moves at all (stays centered even when you turn on headlights and blower), the gauge or its wiring may be faulty.
Final Take for Aftermarket Teams
Ammeter Gauge (PartTerminologyID 1452) sits squarely in the classic car restoration lane, which means the buyer is usually not guessing. They know what belongs in the dash, they care about period correctness, and they will absolutely notice when the face graphics, pointer shape, bezel finish, or illumination color is “close enough” instead of correct. That’s why this category wins or loses on detail. The catalog challenges are predictable but unforgiving: exact gauge diameter (including bezel lip, not just the body), depth behind the panel, and mounting style. Then you have the electrical side, where the amperage range has to match the charging system and the intended wiring approach, and the terminal configuration has to match how the factory or the restoration harness is laid out. If you miss any of those, you don’t just get returns, you get angry reviews from people who usually do not return things lightly.
The teams that catalog this well treat an ammeter as both a functional electrical component and a visible interior trim piece. They specify the physical attributes (diameter, depth, mounting bracket type, stud size, terminal clocking and orientation, included hardware) and the visual attributes (face color, numbering style, font, logo placement, needle color, tick marks, bezel color and shape, lens style, illumination type). They also separate OEM replacement style gauges from universal hot rod gauges in a way the customer can understand quickly. OEM replacement is about matching the factory look and fit, universal is about a generic size and a generic face that may work functionally but will not look right in a concours level interior. That distinction should be obvious in the title, bullets, and attributes, not buried in a note.
The safety story around ammeter to voltmeter conversion is not fear marketing, it is legitimate buyer education. Traditional in line ammeters can carry significant current through the gauge circuit, which means wiring condition and routing matters. A restored car with modern accessories, aging insulation, questionable crimps, or a non factory alternator upgrade can turn an ammeter circuit into a real risk, especially if the harness was repaired over the years. This is exactly where content helps conversion instead of distracting from it. You can explain what the ammeter measures, why certain installs require heavy gauge wiring and clean connections, and when a voltmeter is the safer alternative that still gives the driver meaningful information.
From a merchandising standpoint, you should treat voltmeter conversion kits as a default cross sell for every ammeter application, not as a separate blog post that only a few people find. If a customer is shopping an ammeter, they are already in decision mode. Give them the safe alternative right there in the fitment flow. Good cross sell options in this category include:
Voltmeter conversion kit (matched face style when possible)
Inline shunt or external shunt solutions for ammeter style monitoring
Replacement pigtails, correct ring terminals, and mounting hardware
Dash mounting cups, brackets, and vibration isolation
Correct illumination bulbs or LED upgrades that preserve the period look
Alternator or generator output matching guidance, if you support content modules
If you do all of the above, you end up with listings that feel “built by someone who restores cars,” not “uploaded by someone who sells gauges.” That is the difference between a category that quietly churns returns and one that earns trust, captures the right buyers, and creates an easy safety upsell without hurting authenticity.